- NEW McLaren F1 Team CollectionNEW McLaren F1 Team Collection
- Over 19,000 ★★★★★ reviewsOver 19,000 ★★★★★ reviews
- 30-Day Returns available for UK orders. T&Cs apply.30-Day Returns available for UK orders. T&Cs apply.
Owner's Guide
Vulcans™
- Choosing the correct Nose Pad
Choosing the correct Nose pad is essential for maximum performance. Your Vulcans should sit close to your cheeks and brow (without touching), allowing air to flow whilst shielding your eyes from the wind.
Nose Pad sizes
4 Nose Pad sizes are included, numbered #1 to #4.
#1 is the smallest nose piece, suited for those with larger noses.
#4 is best suited to those with smaller noses and moves the frame further from your face.
#3 is fitted to your Vulcans as standard.
Lens Fogging
If your lens is fogging whilst exercising, there's not enough ventilation getting to the back side of the lens. Try moving up one Nose Pad size (#1 to #2, etc).
Bouncing on Nose
If your Vulcans are bouncing on your nose, try moving up one Nose Pad size (#1 to #2, etc) and pressing on to your nose when you put them on. The hydrophilic properties of the Nose Pad will keep your Vulcans in place when you sweat and work hard.
Not enough wind coverage
If you’re getting too much wind in your eyes, the frame is sitting too far from your face. Try moving down one Nose Pad size (#3 to #2, etc).
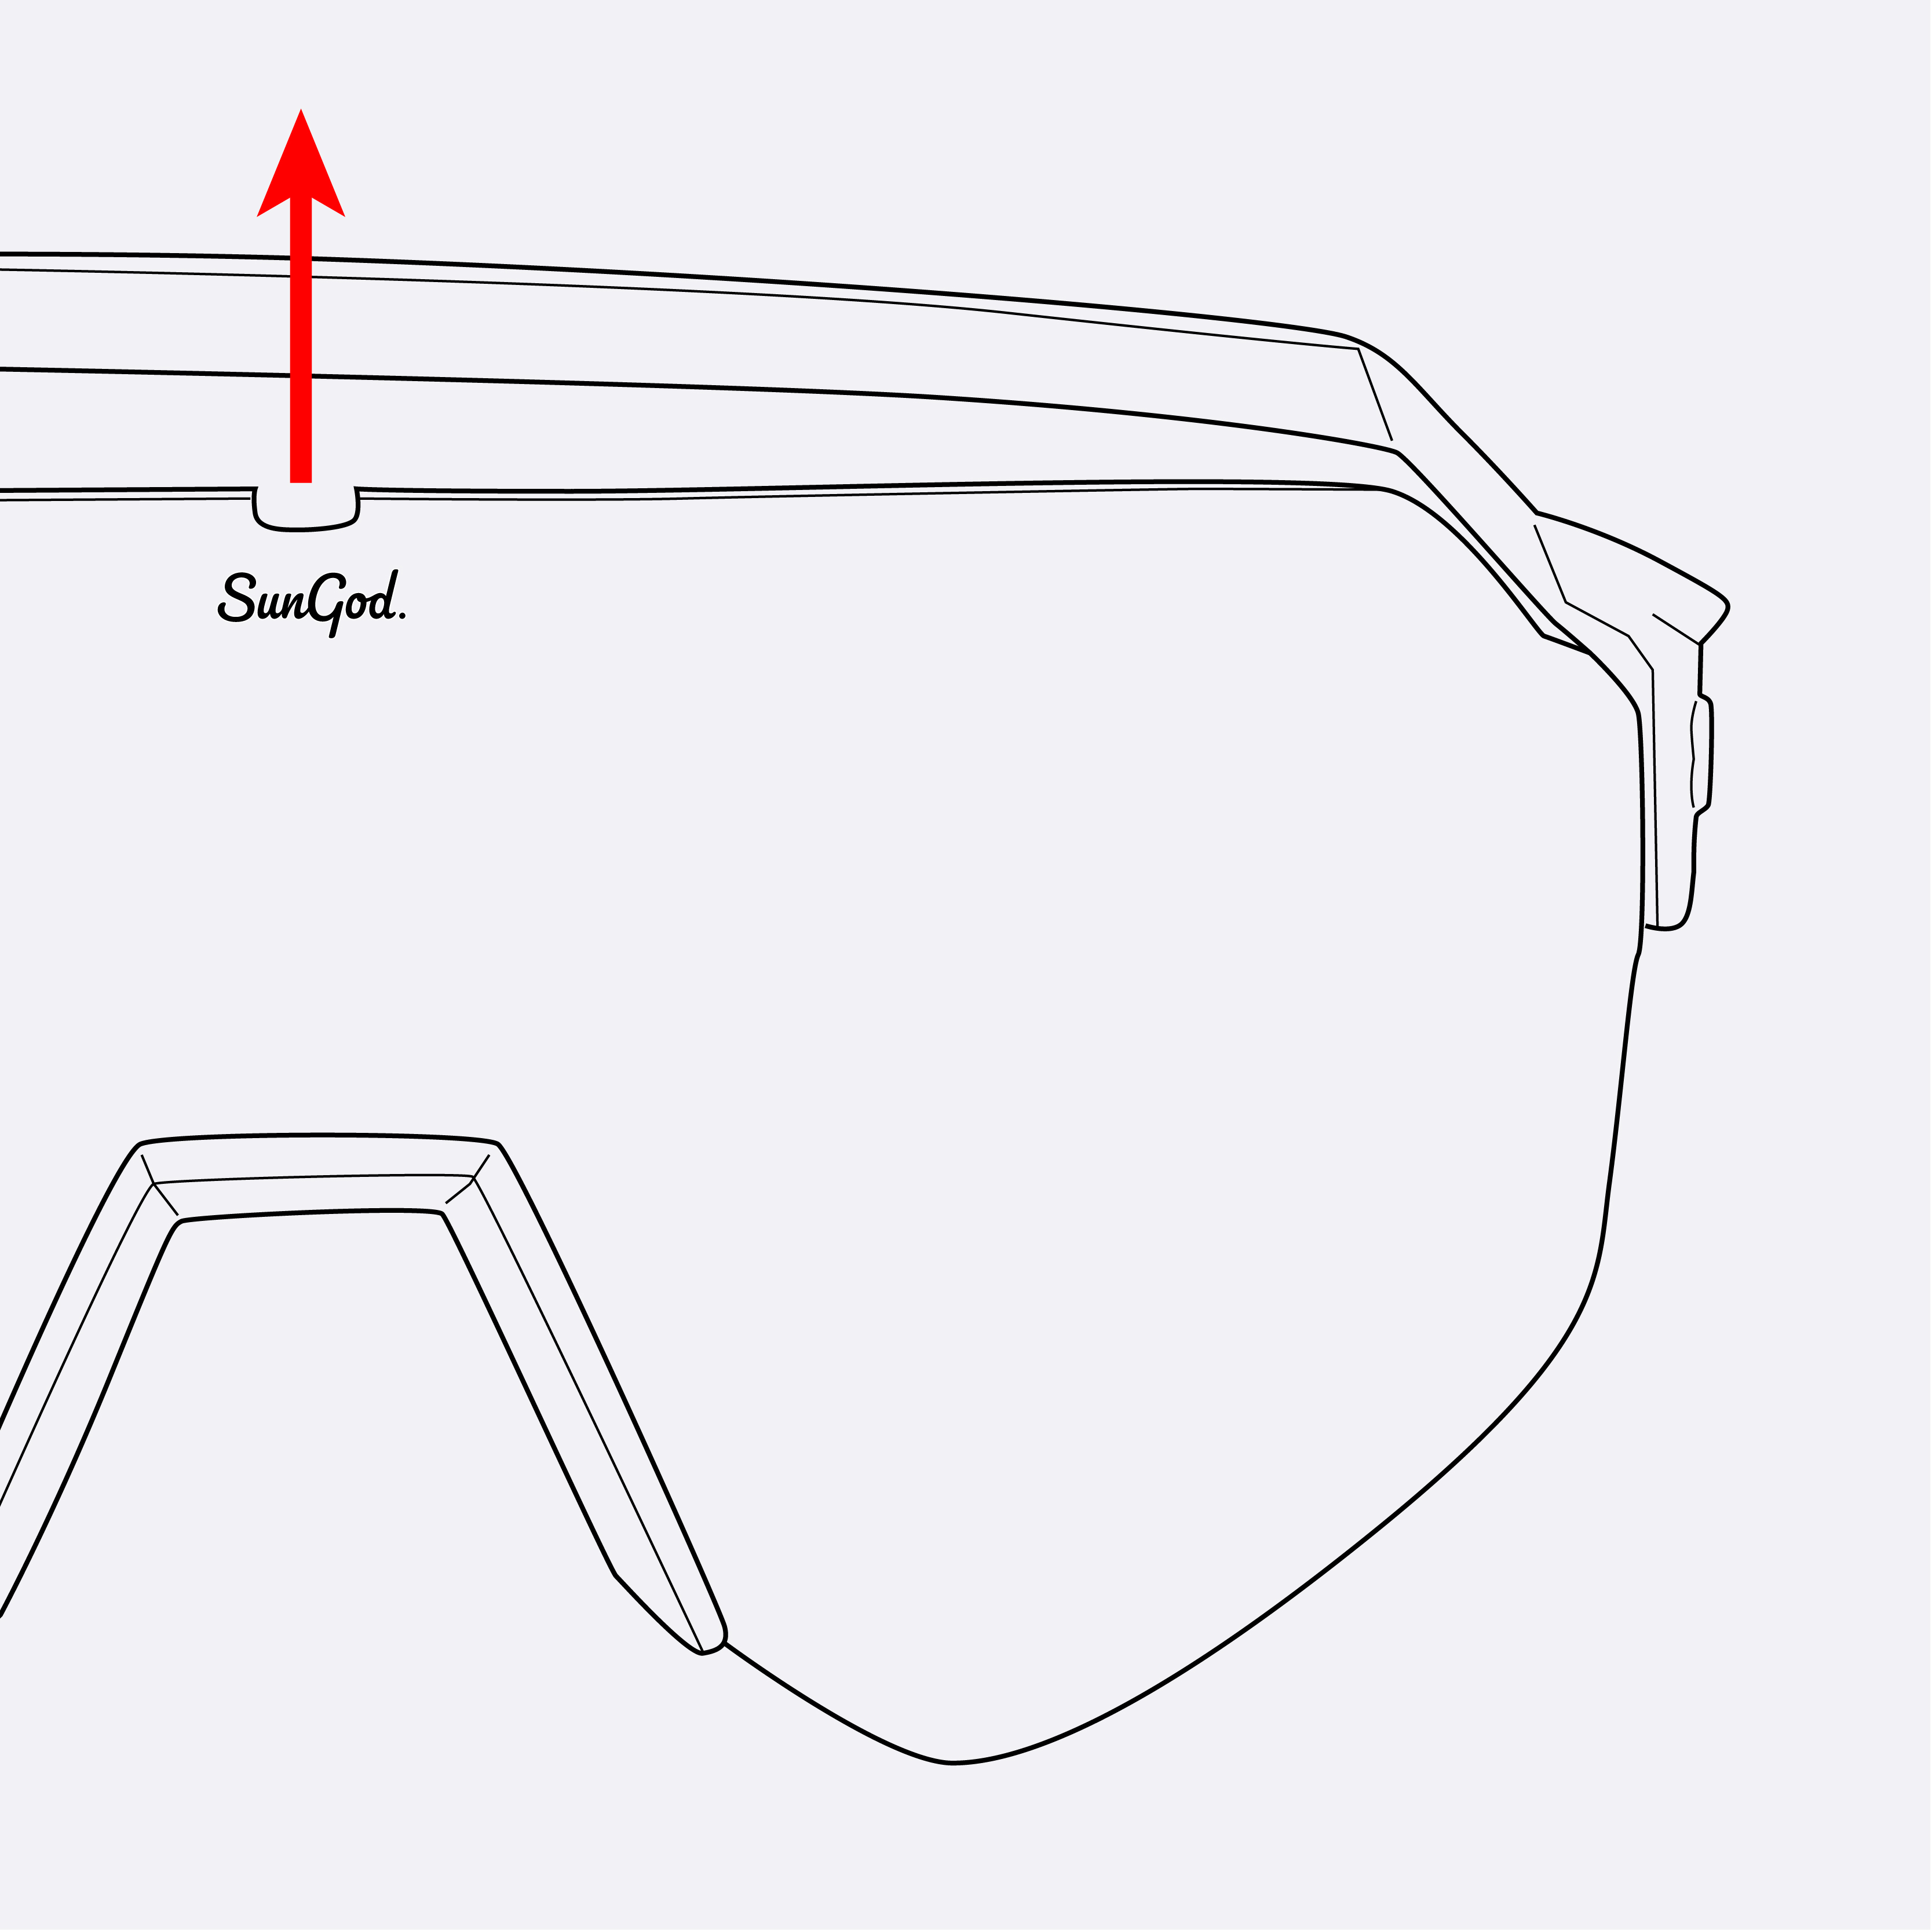
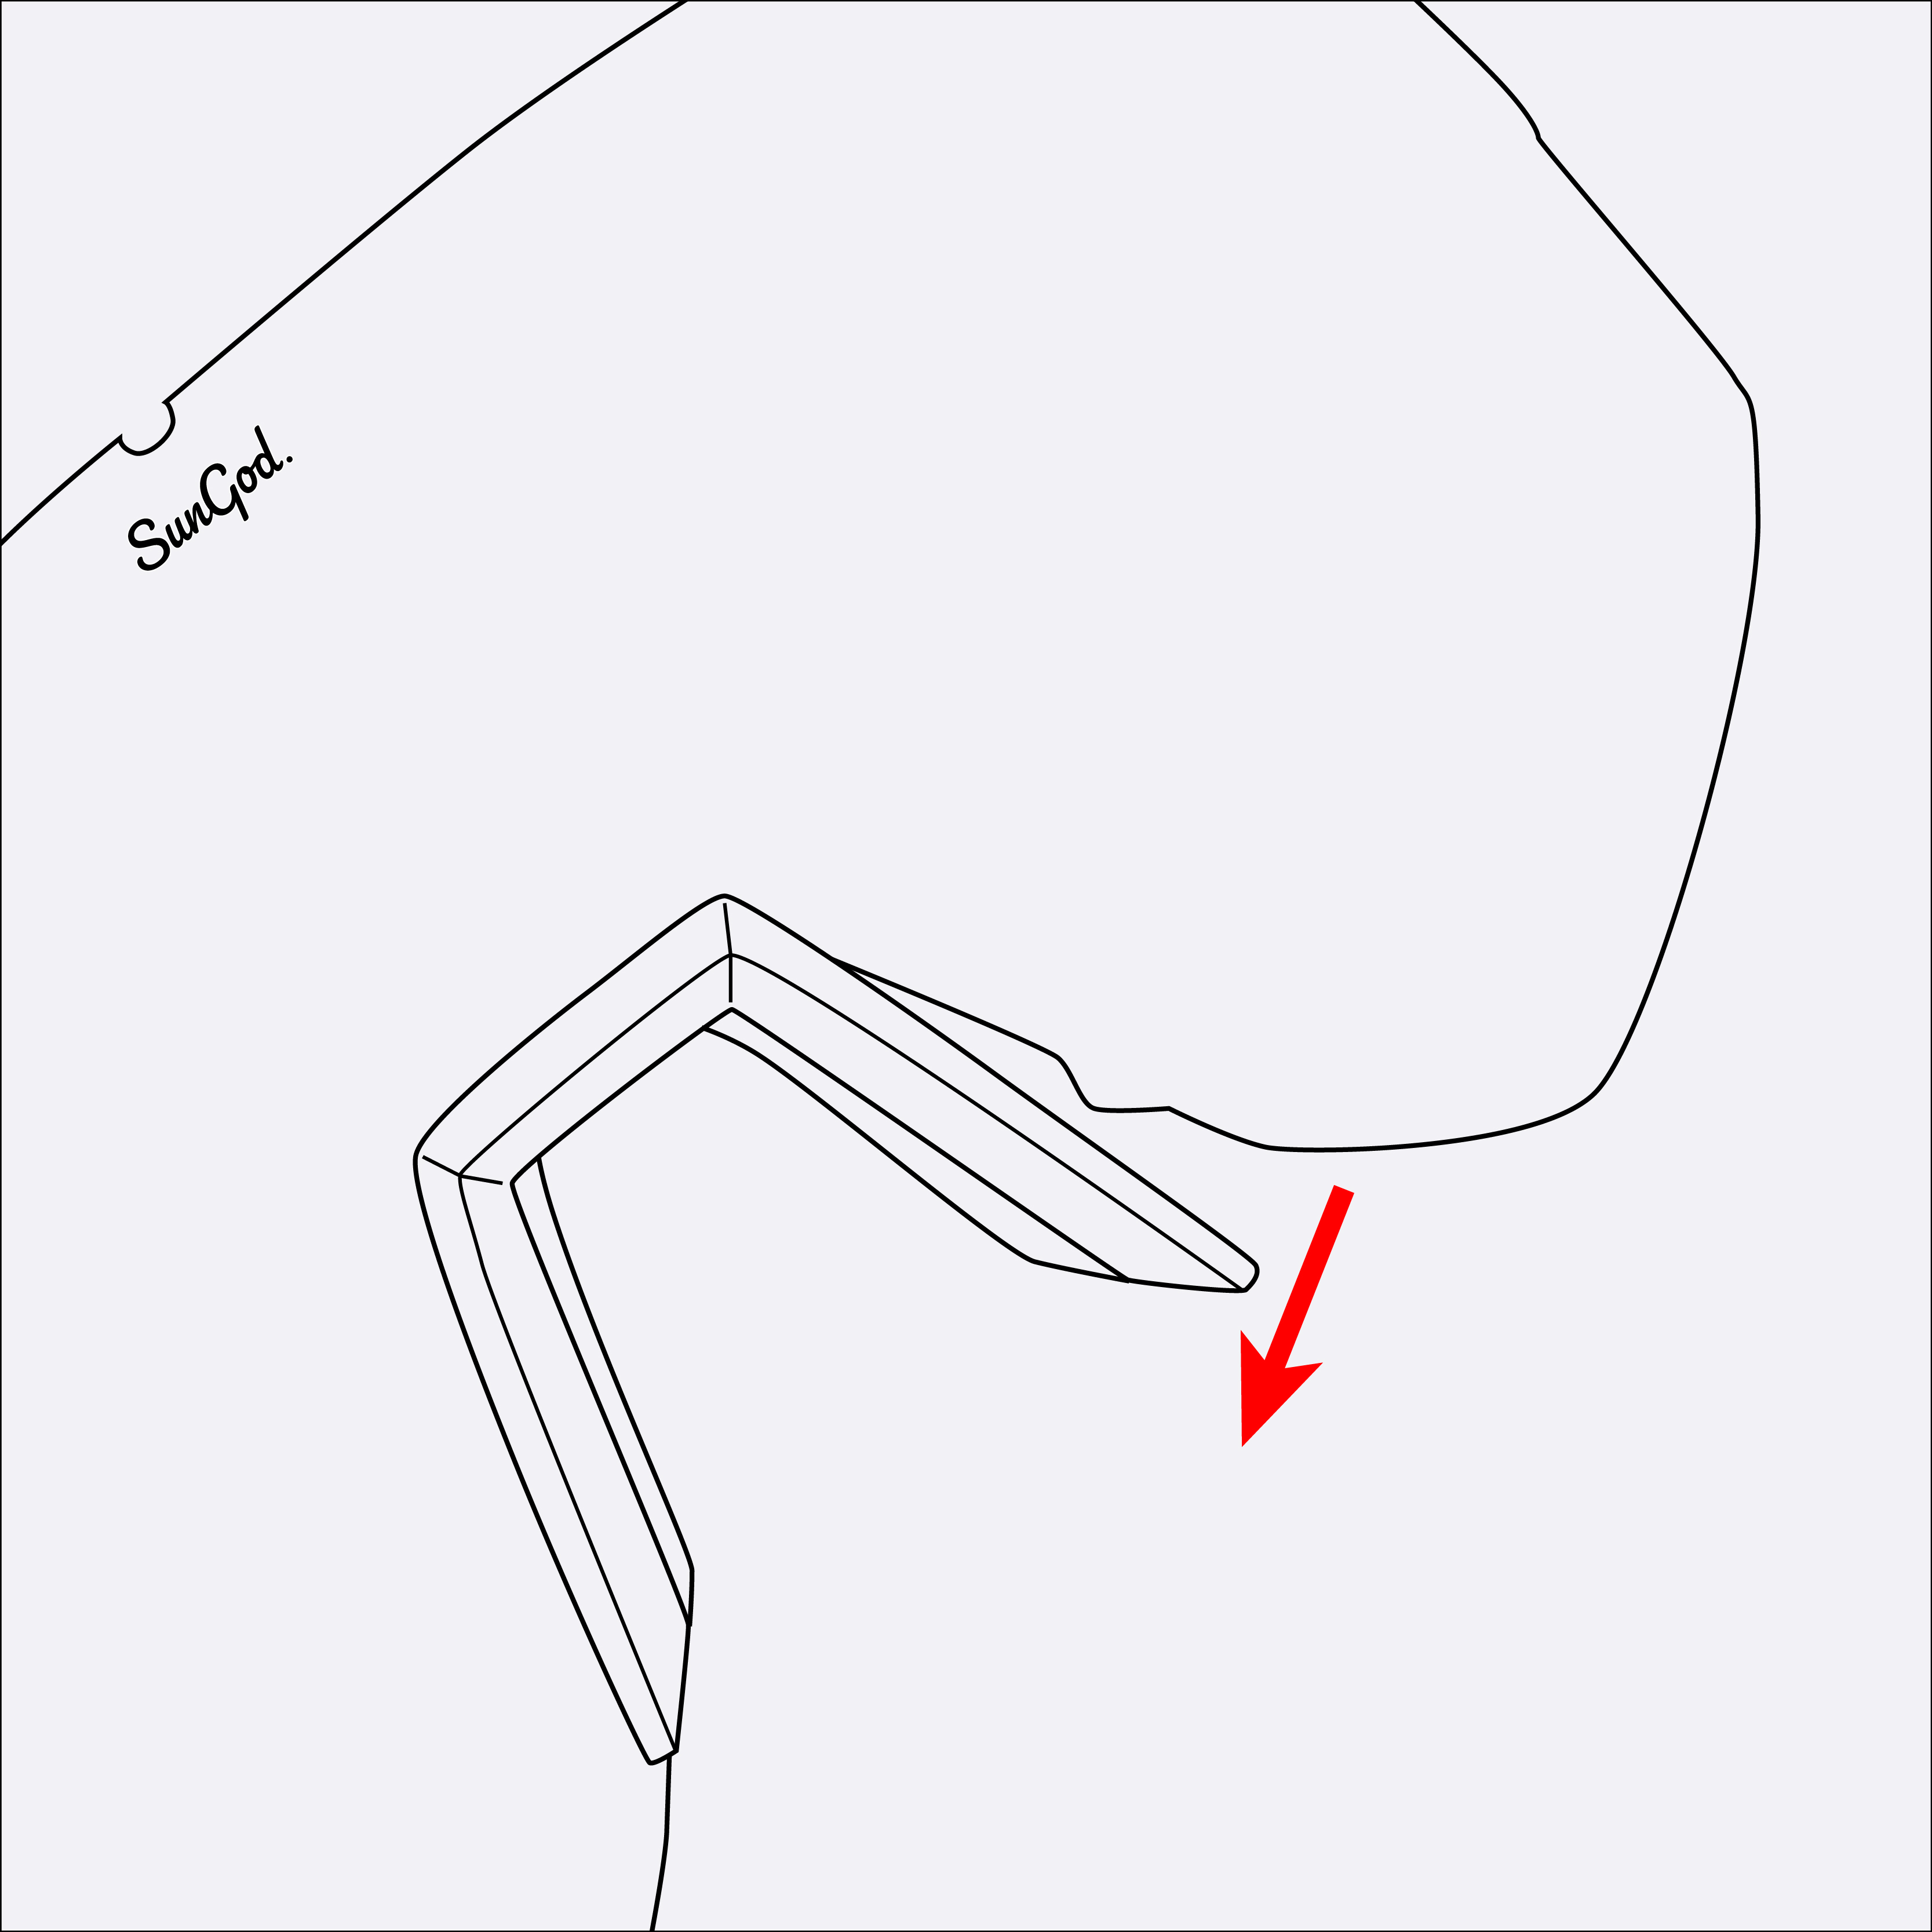
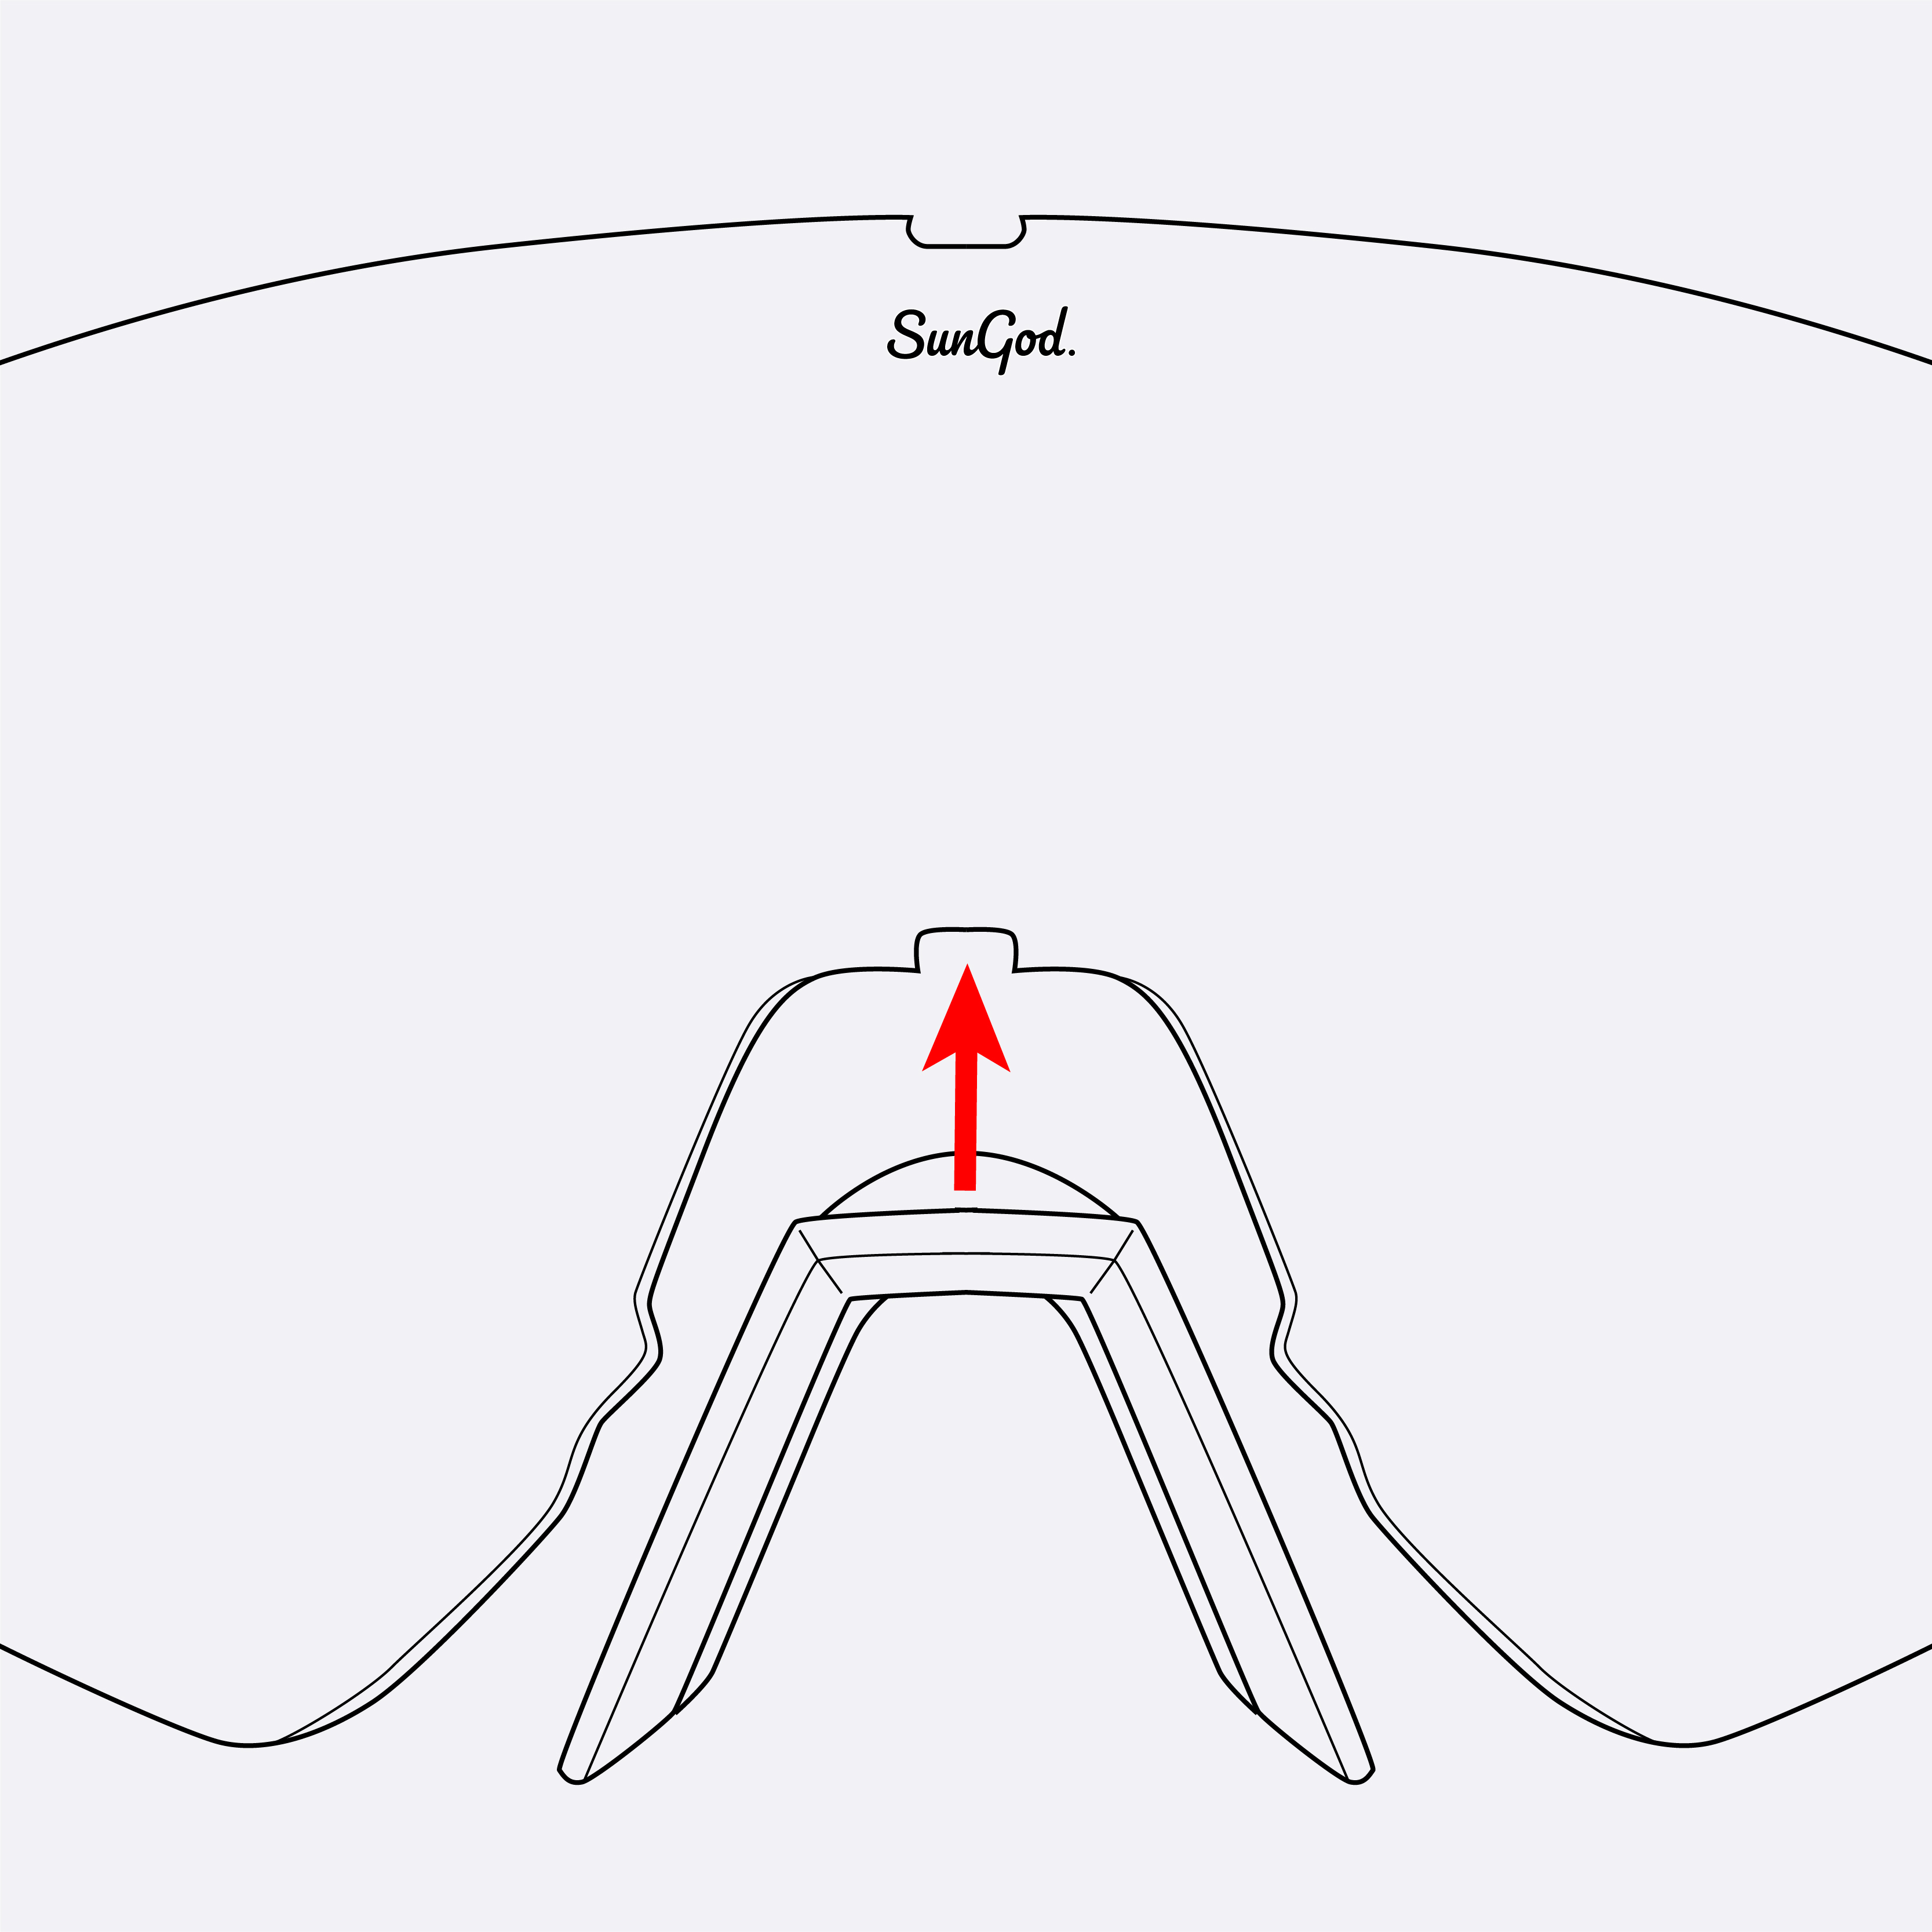
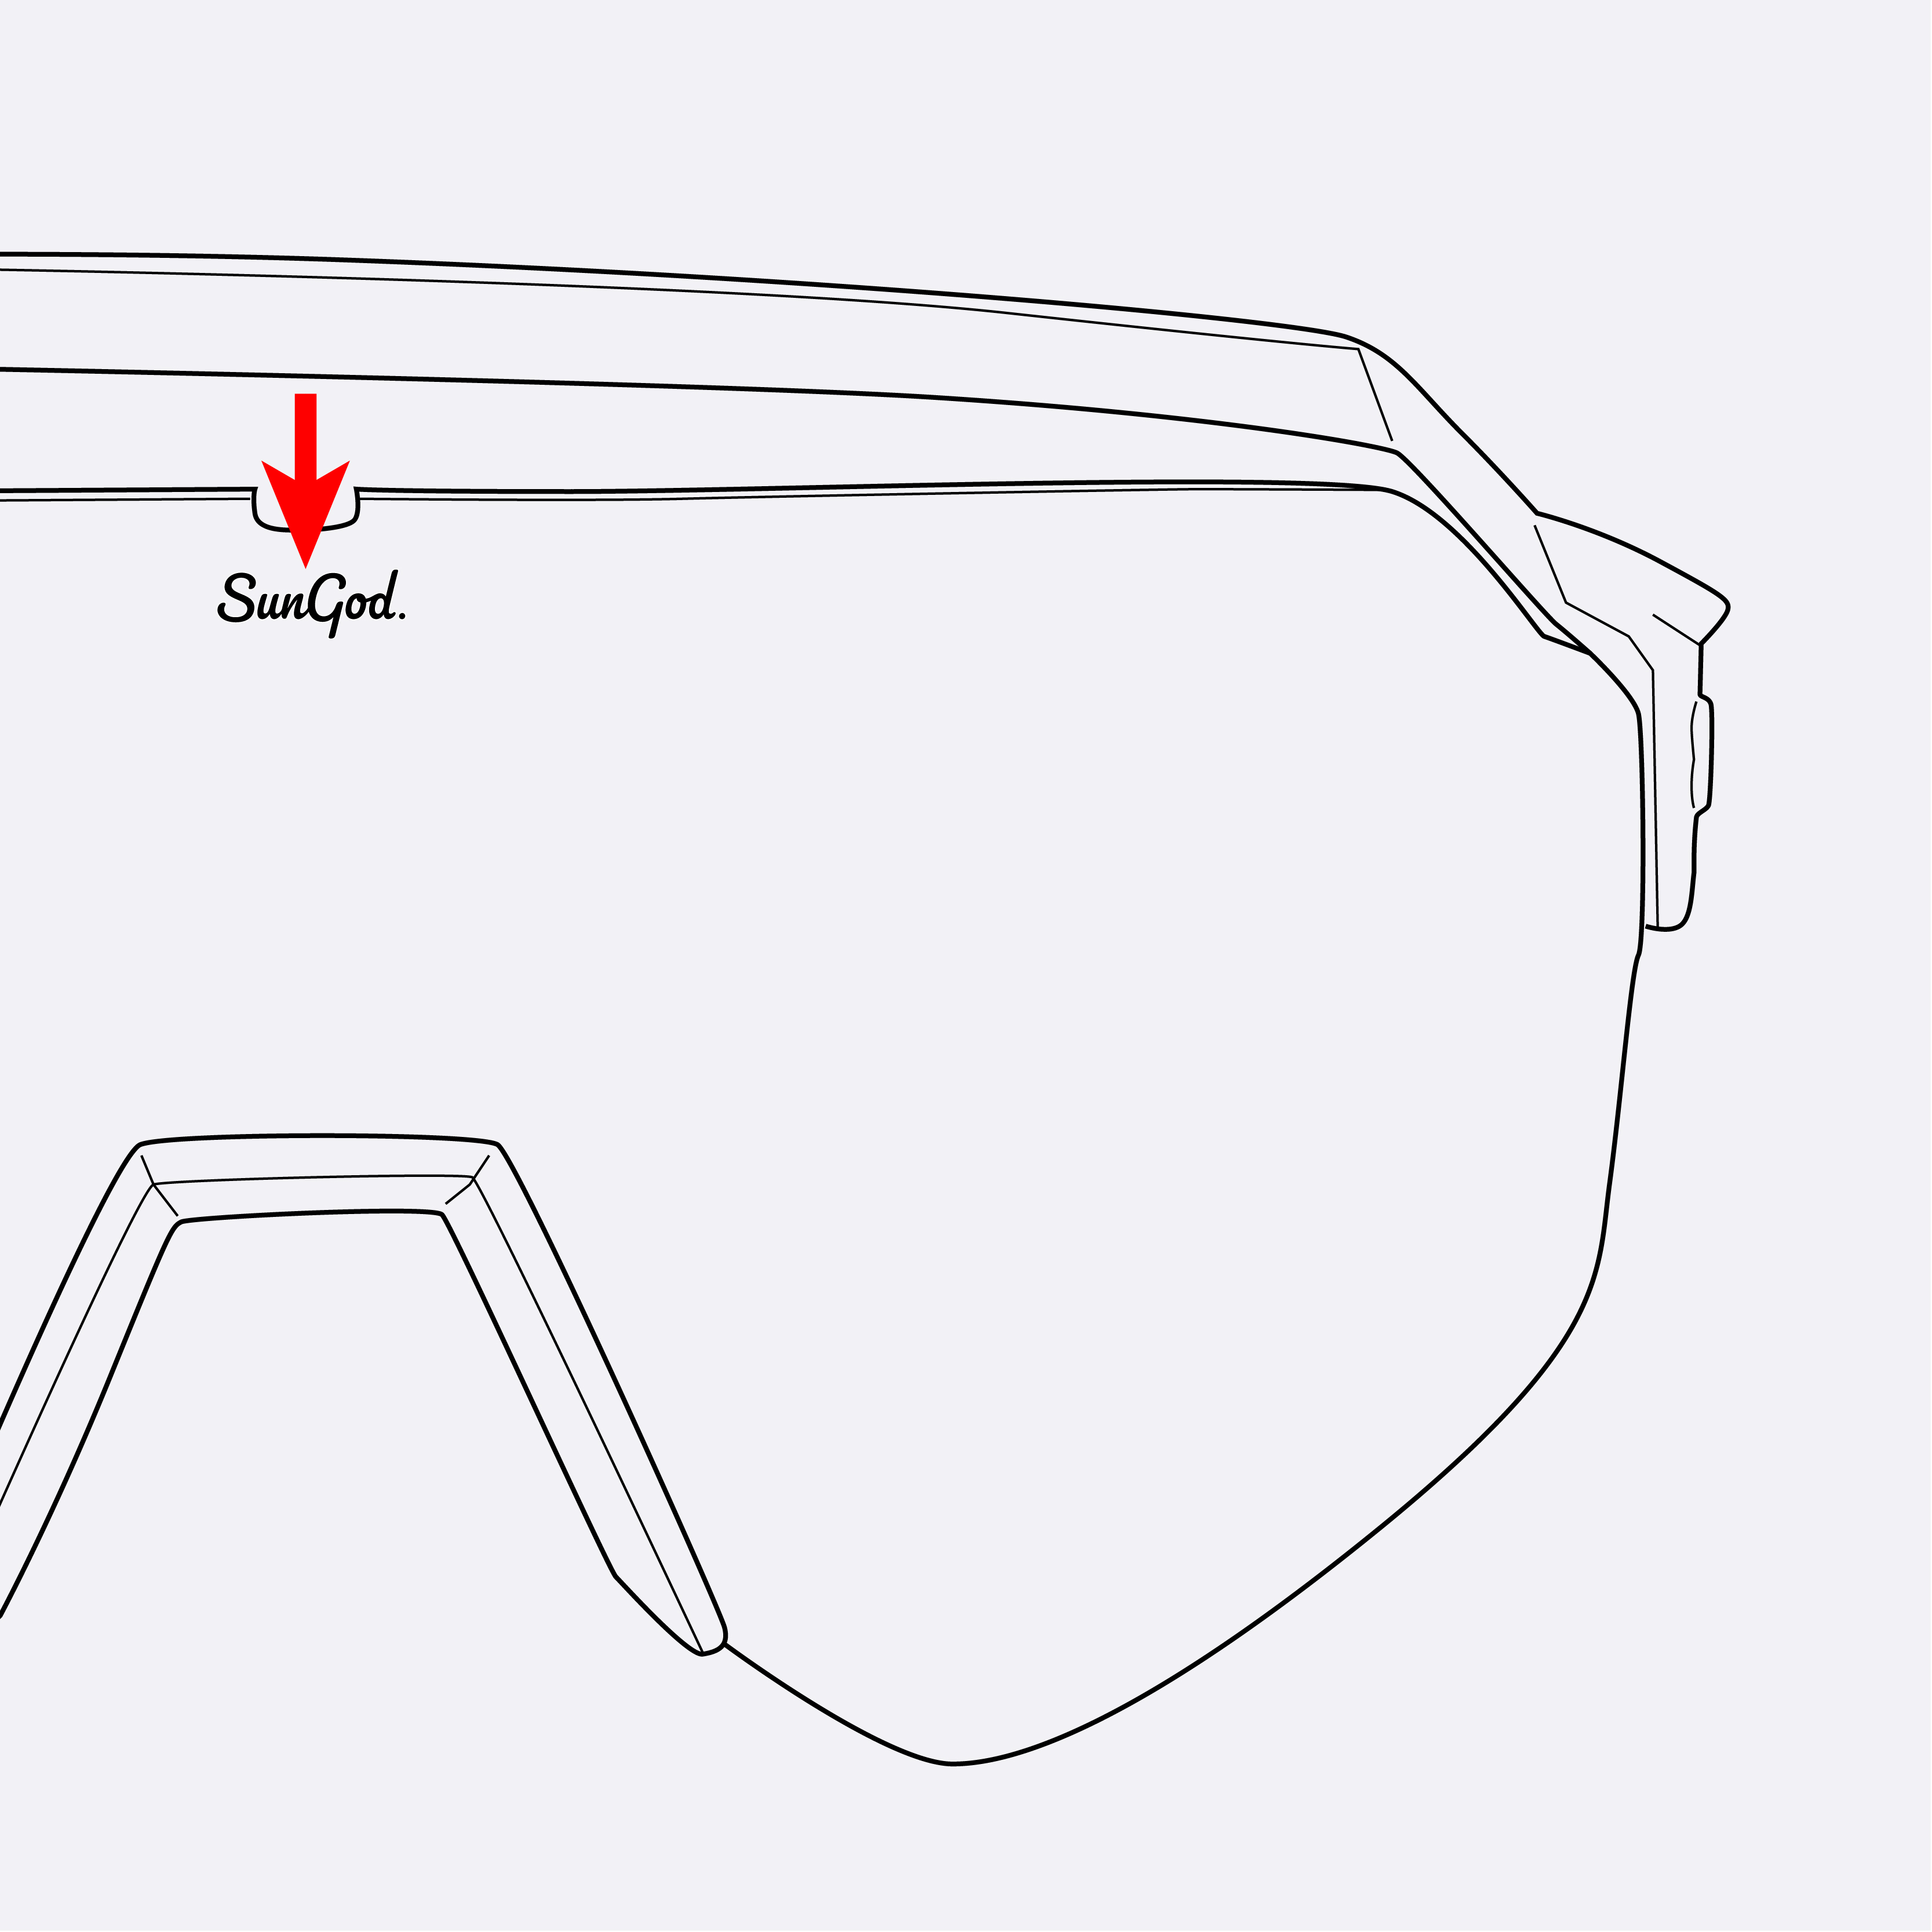
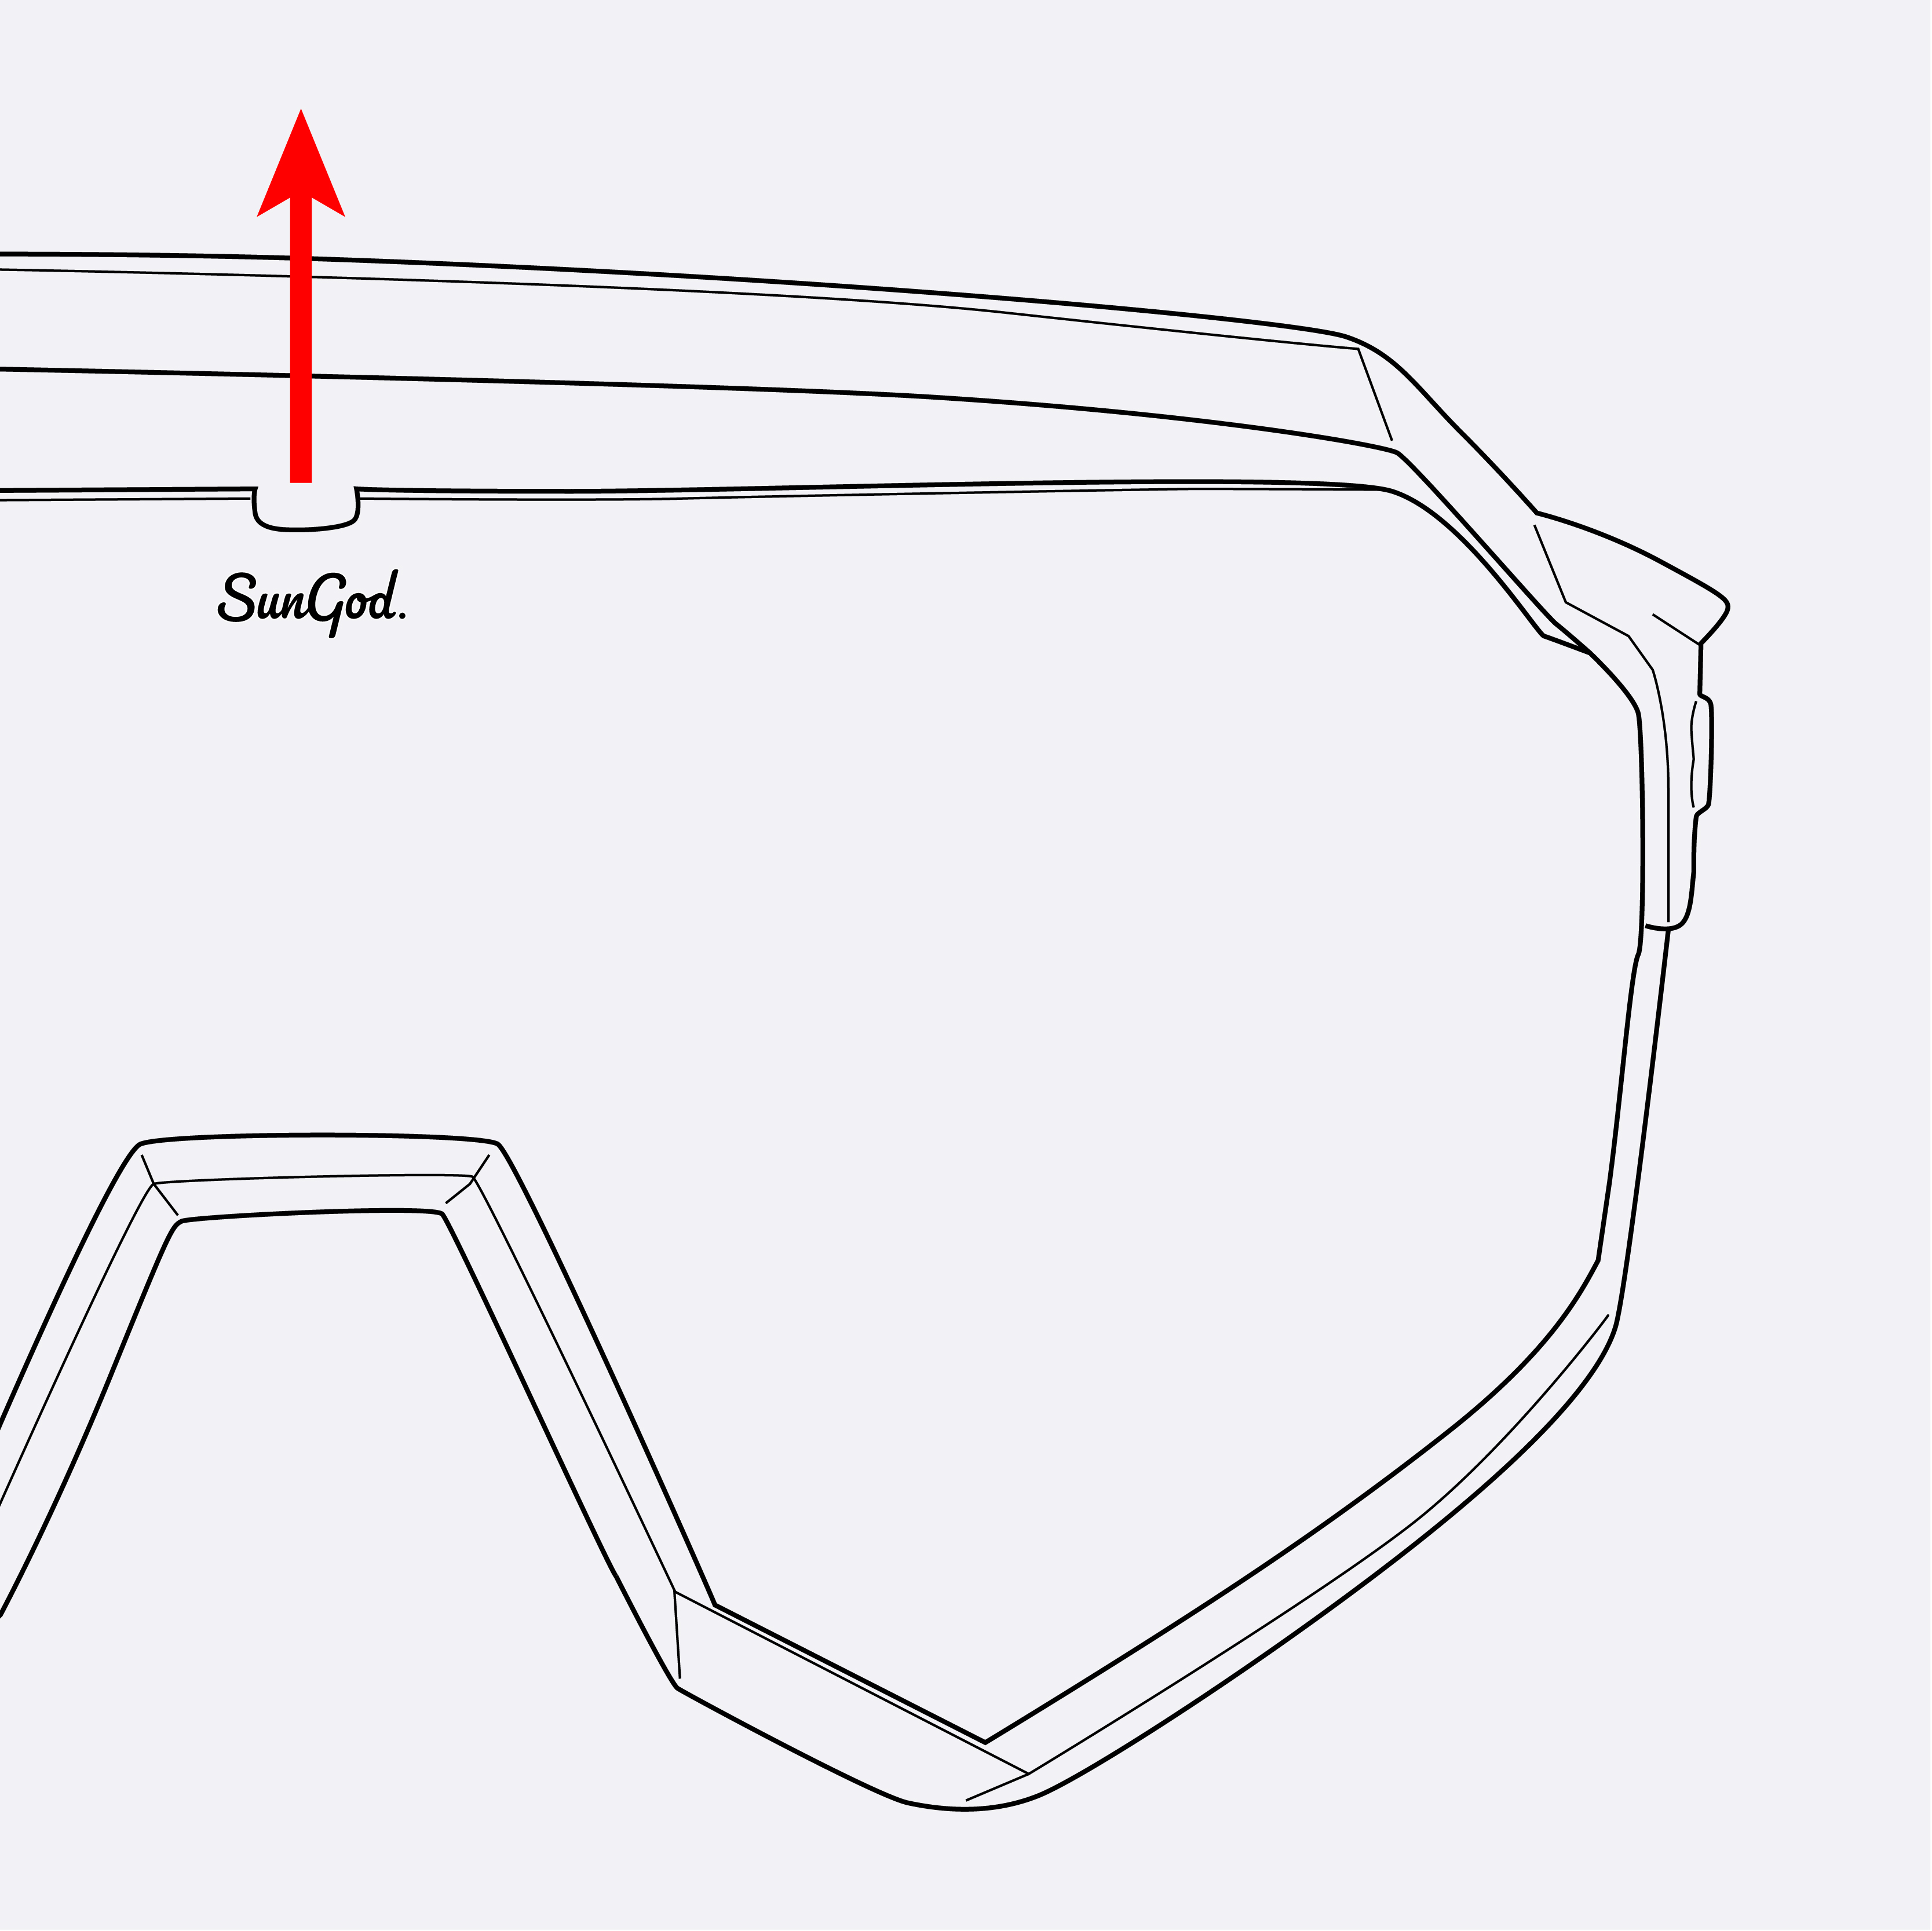
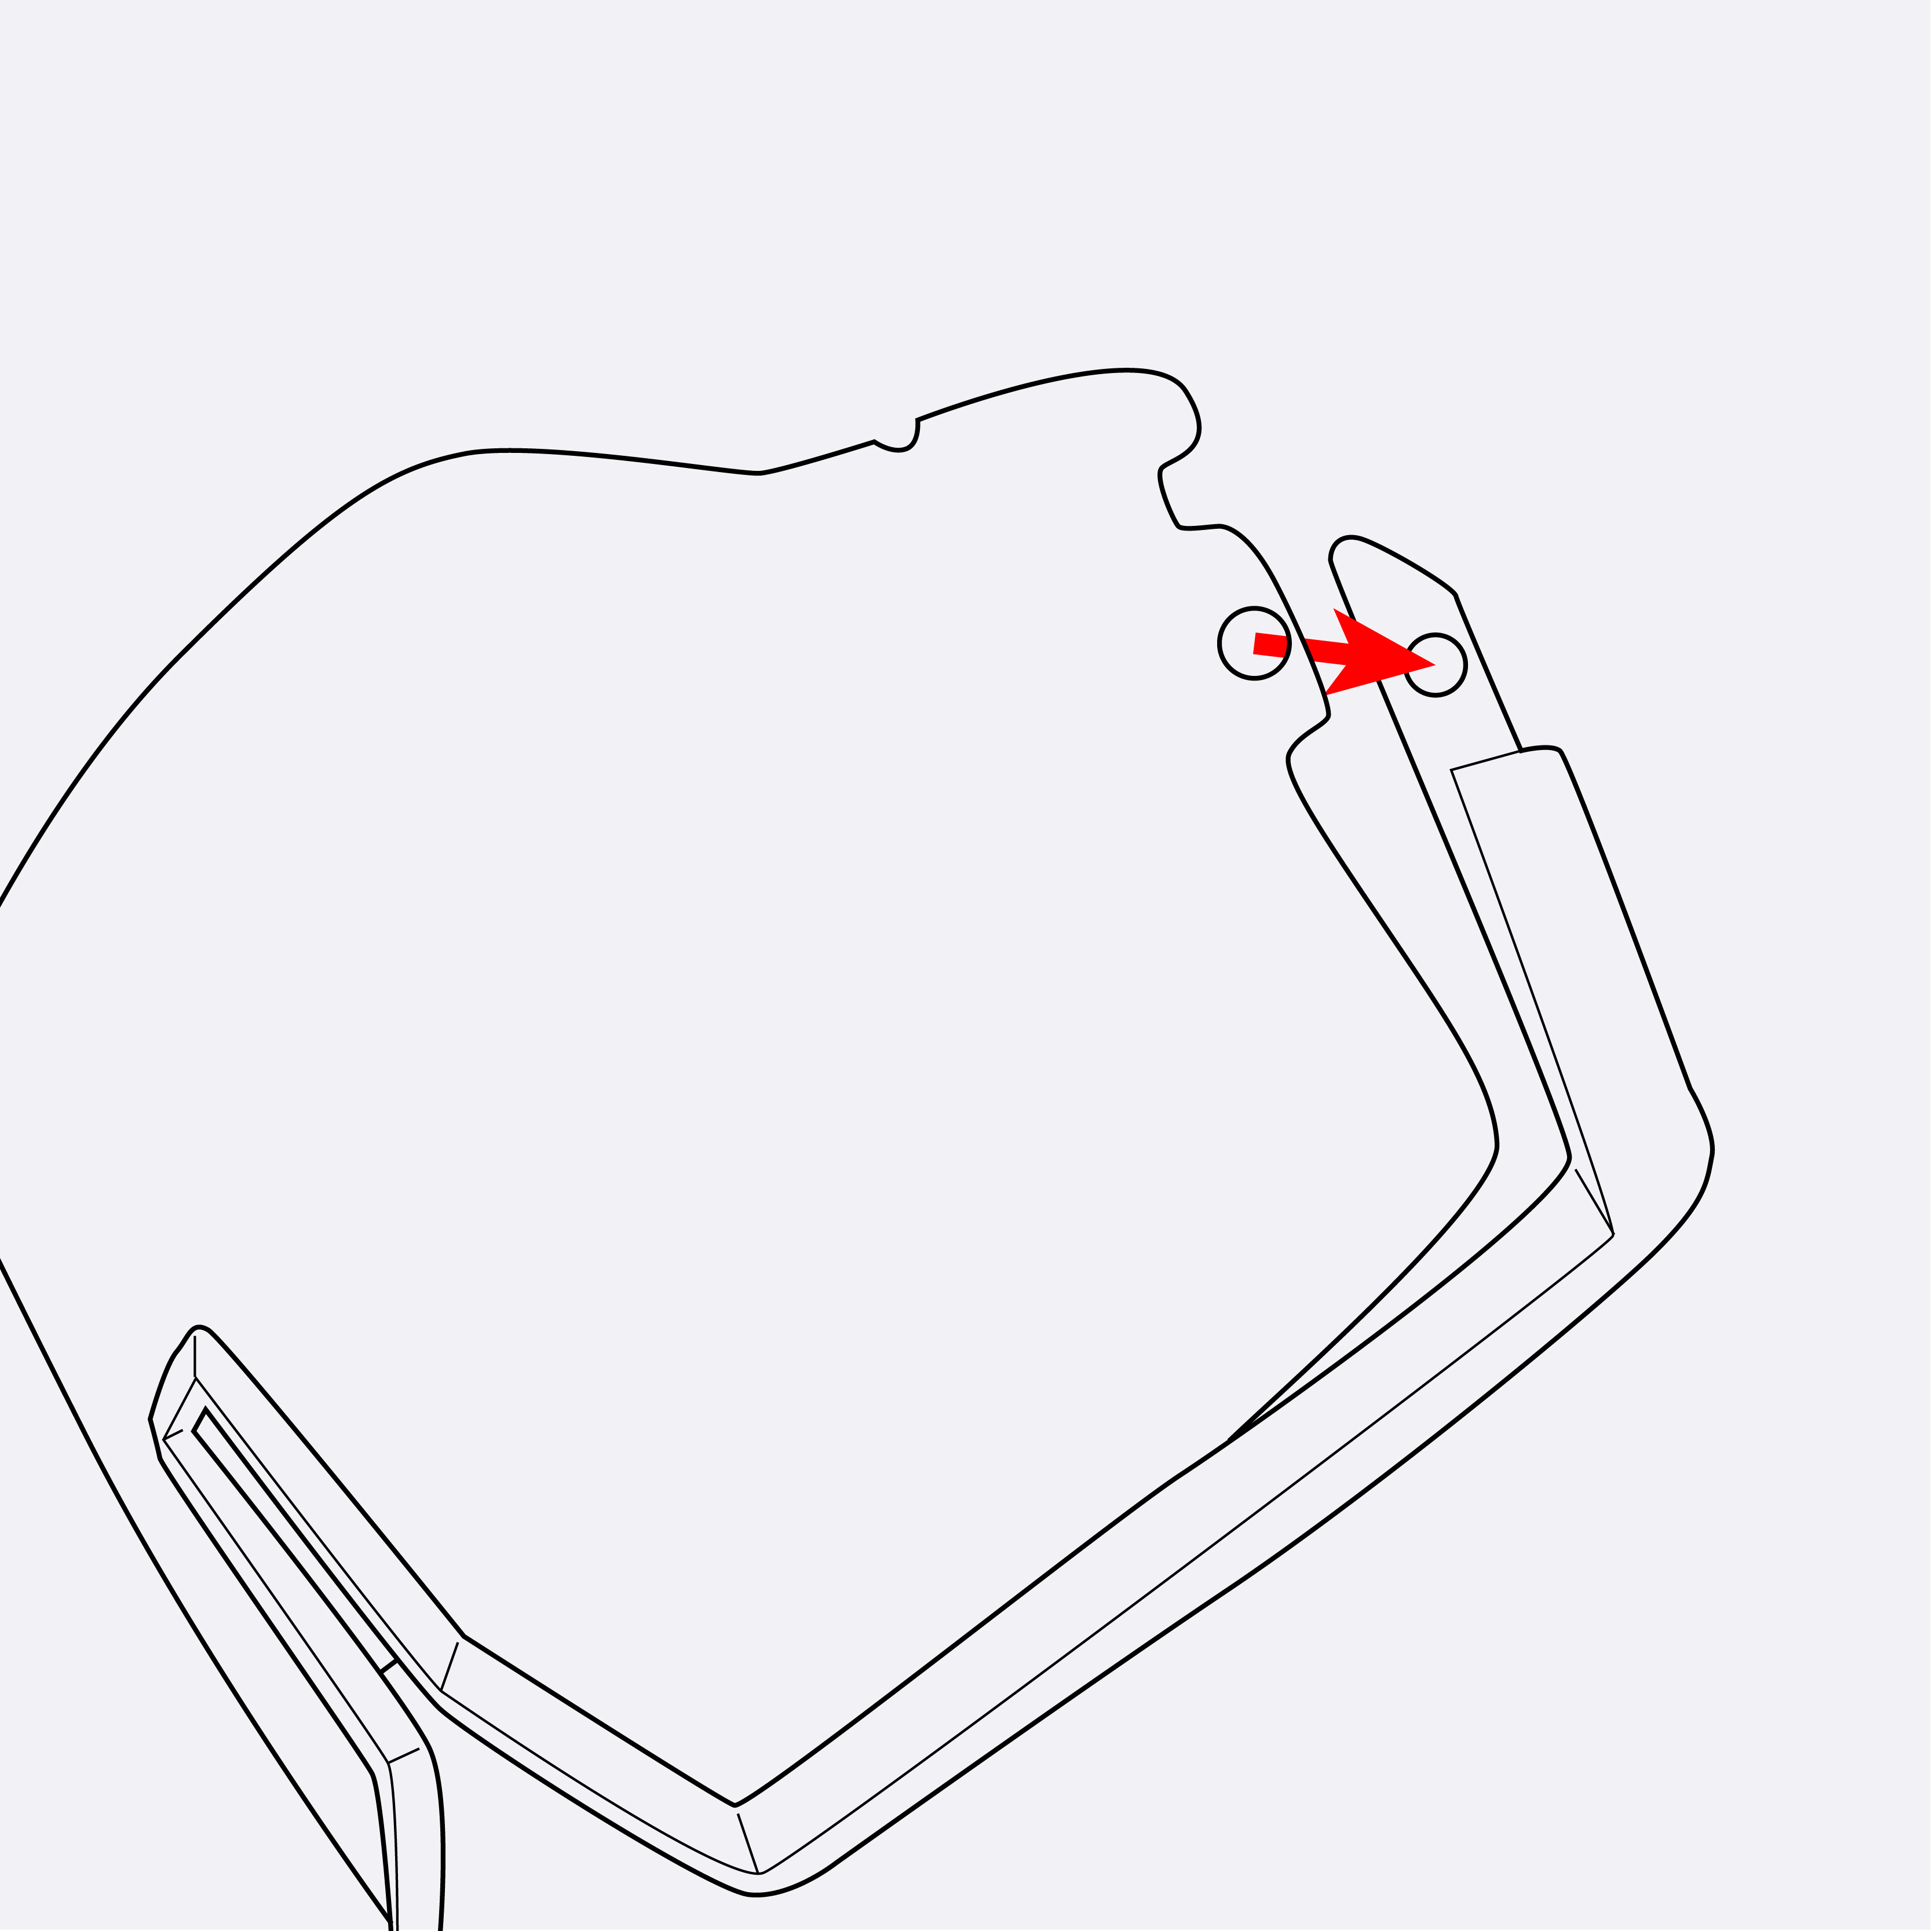
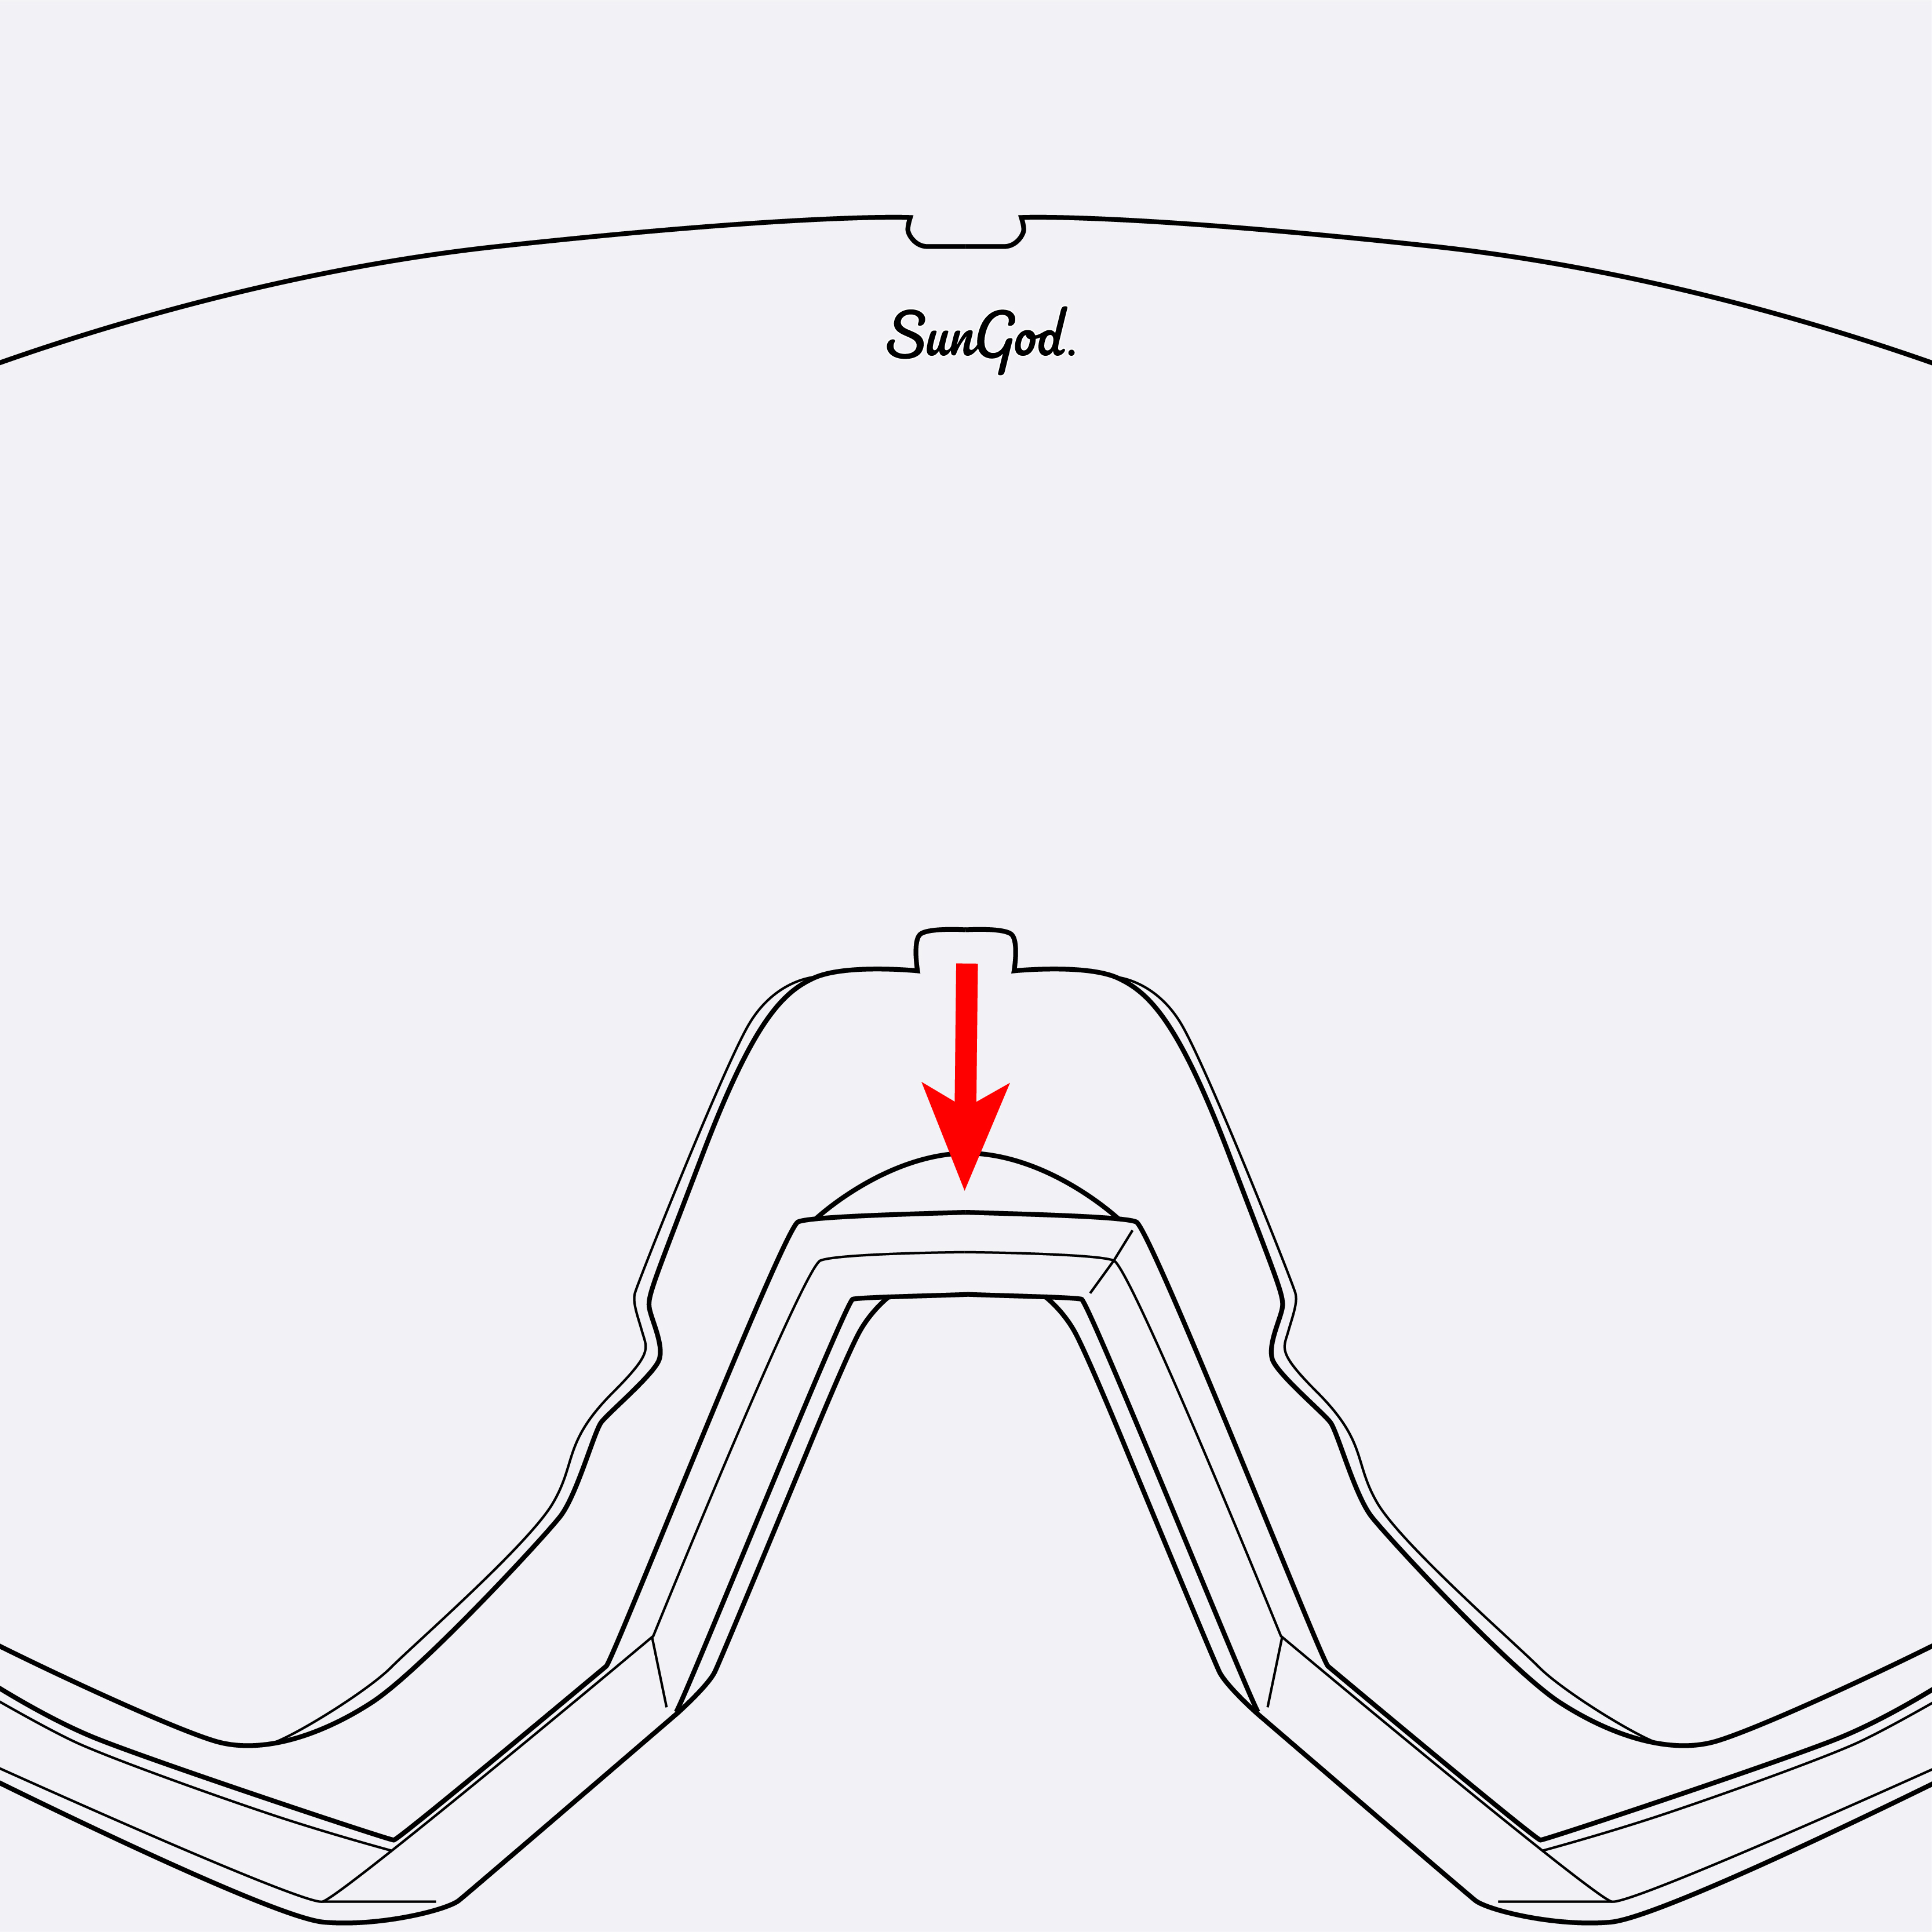
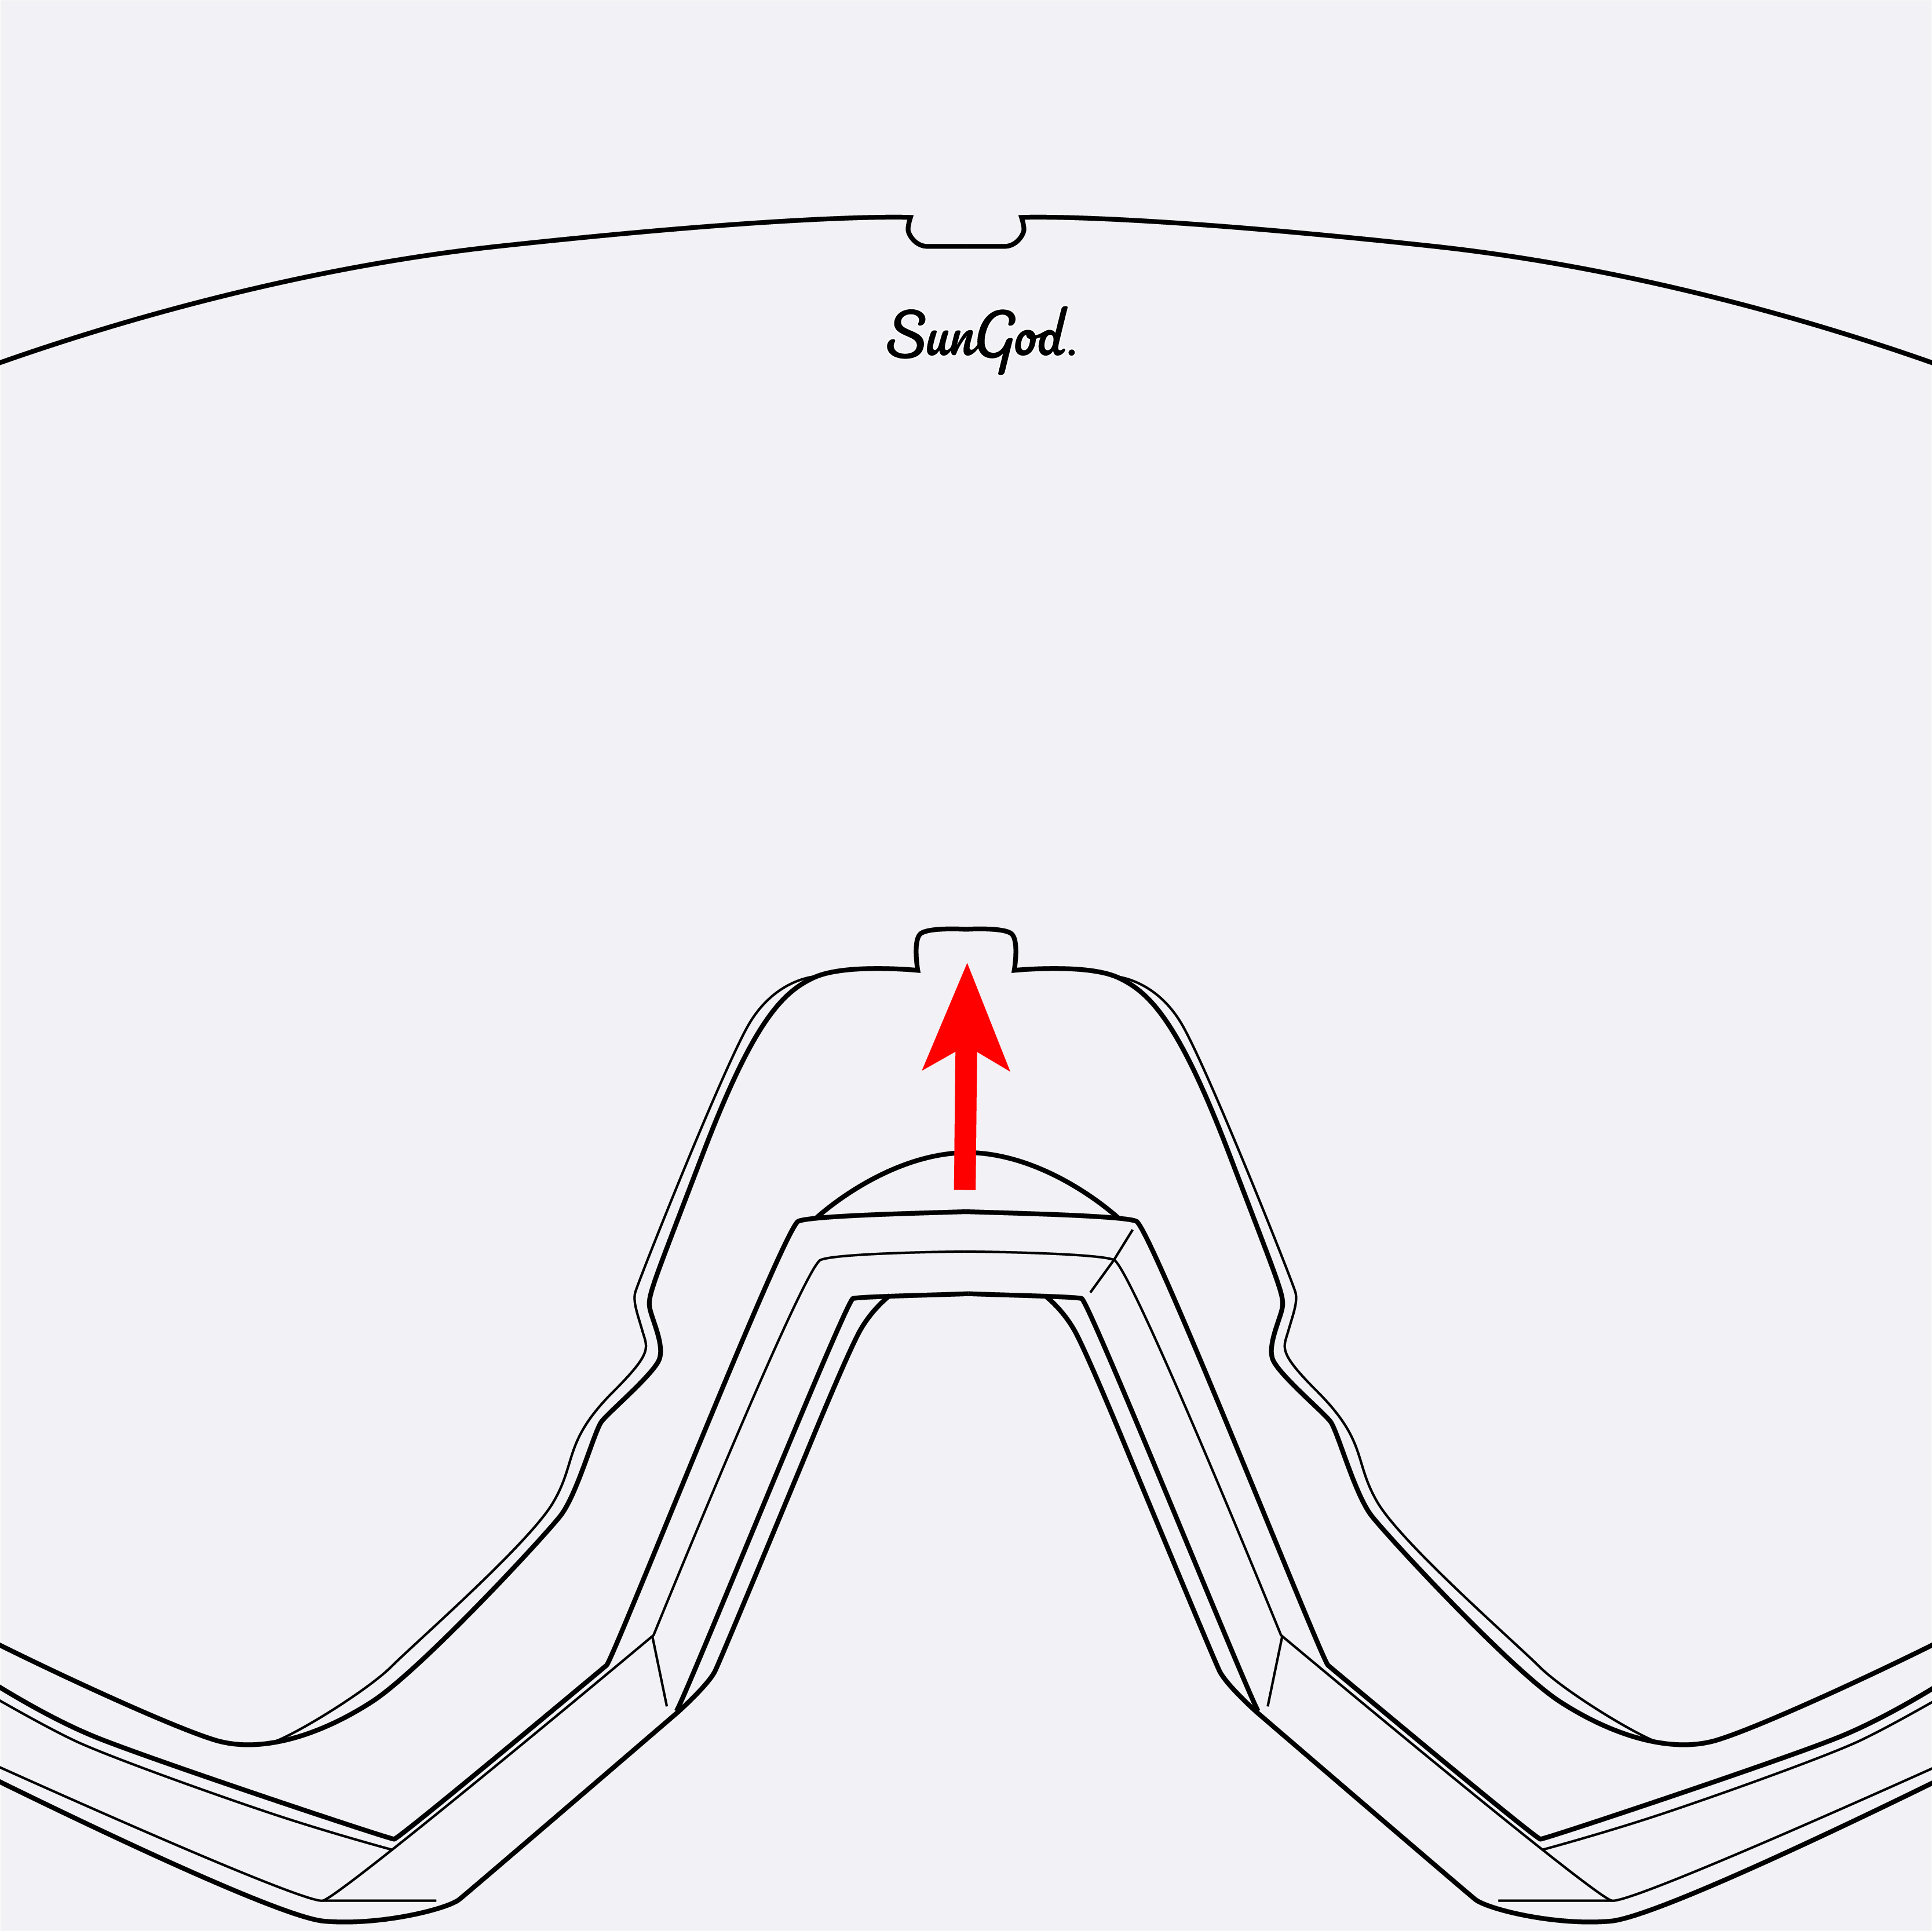
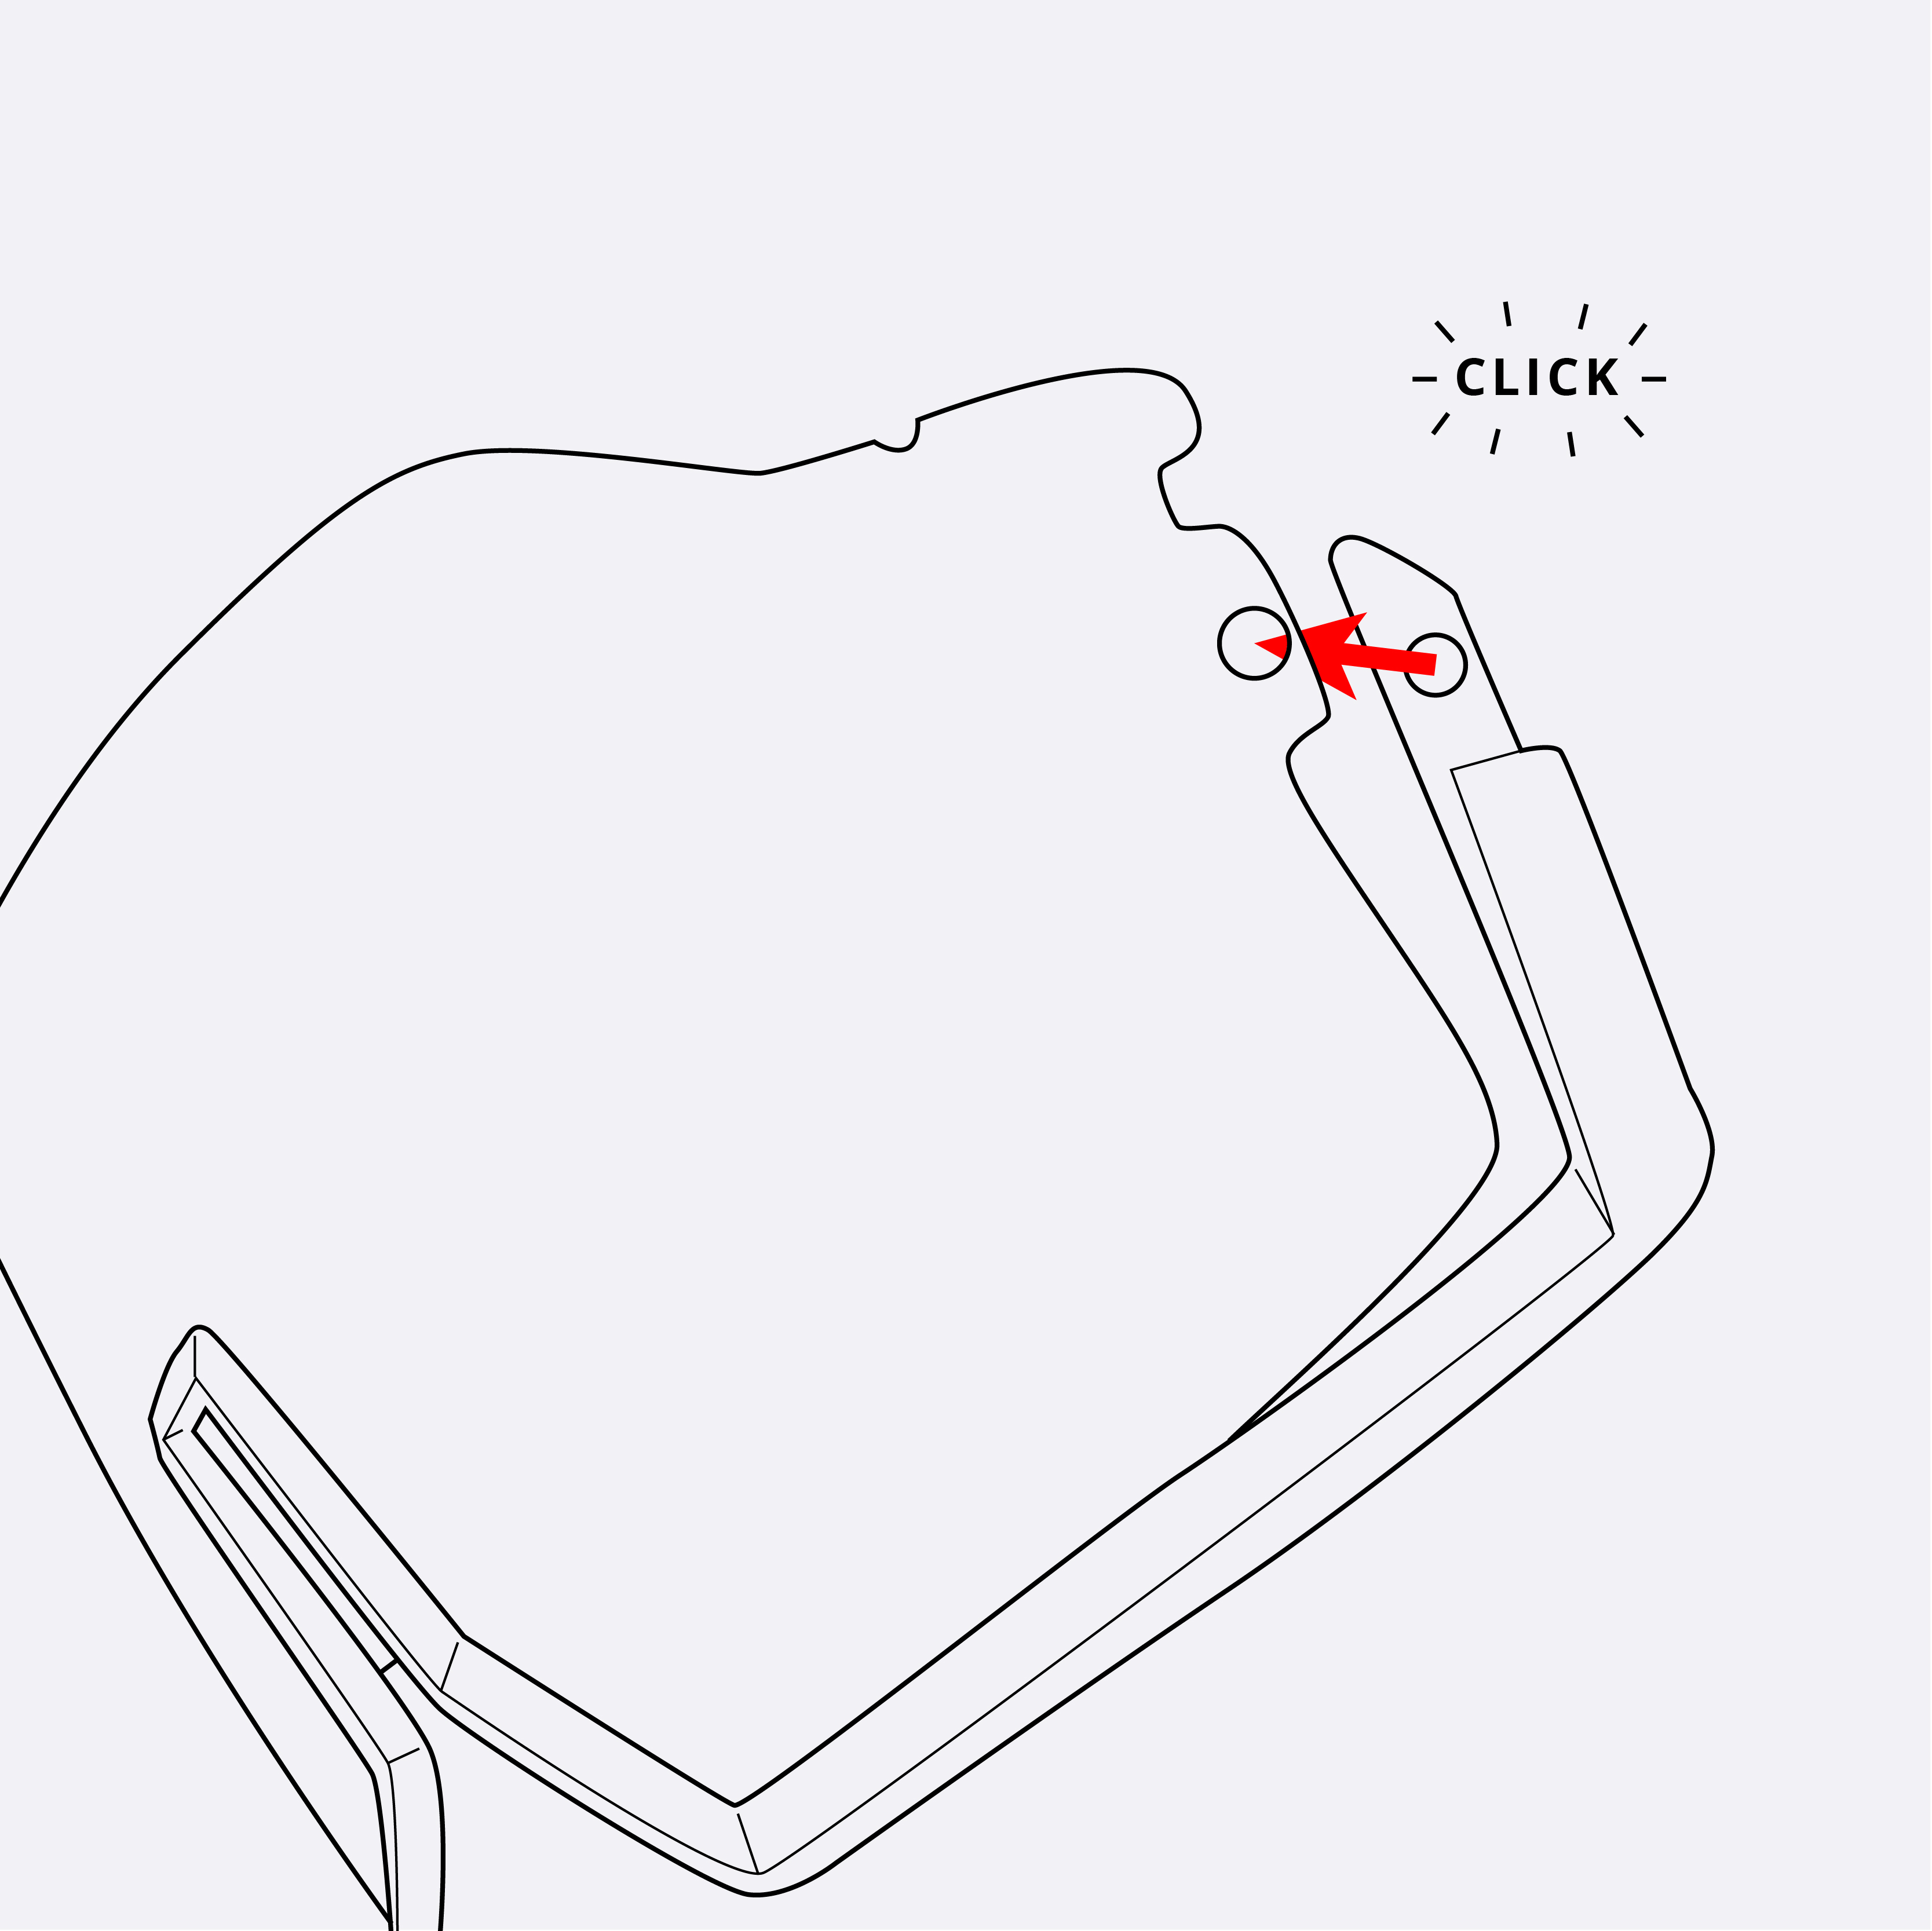
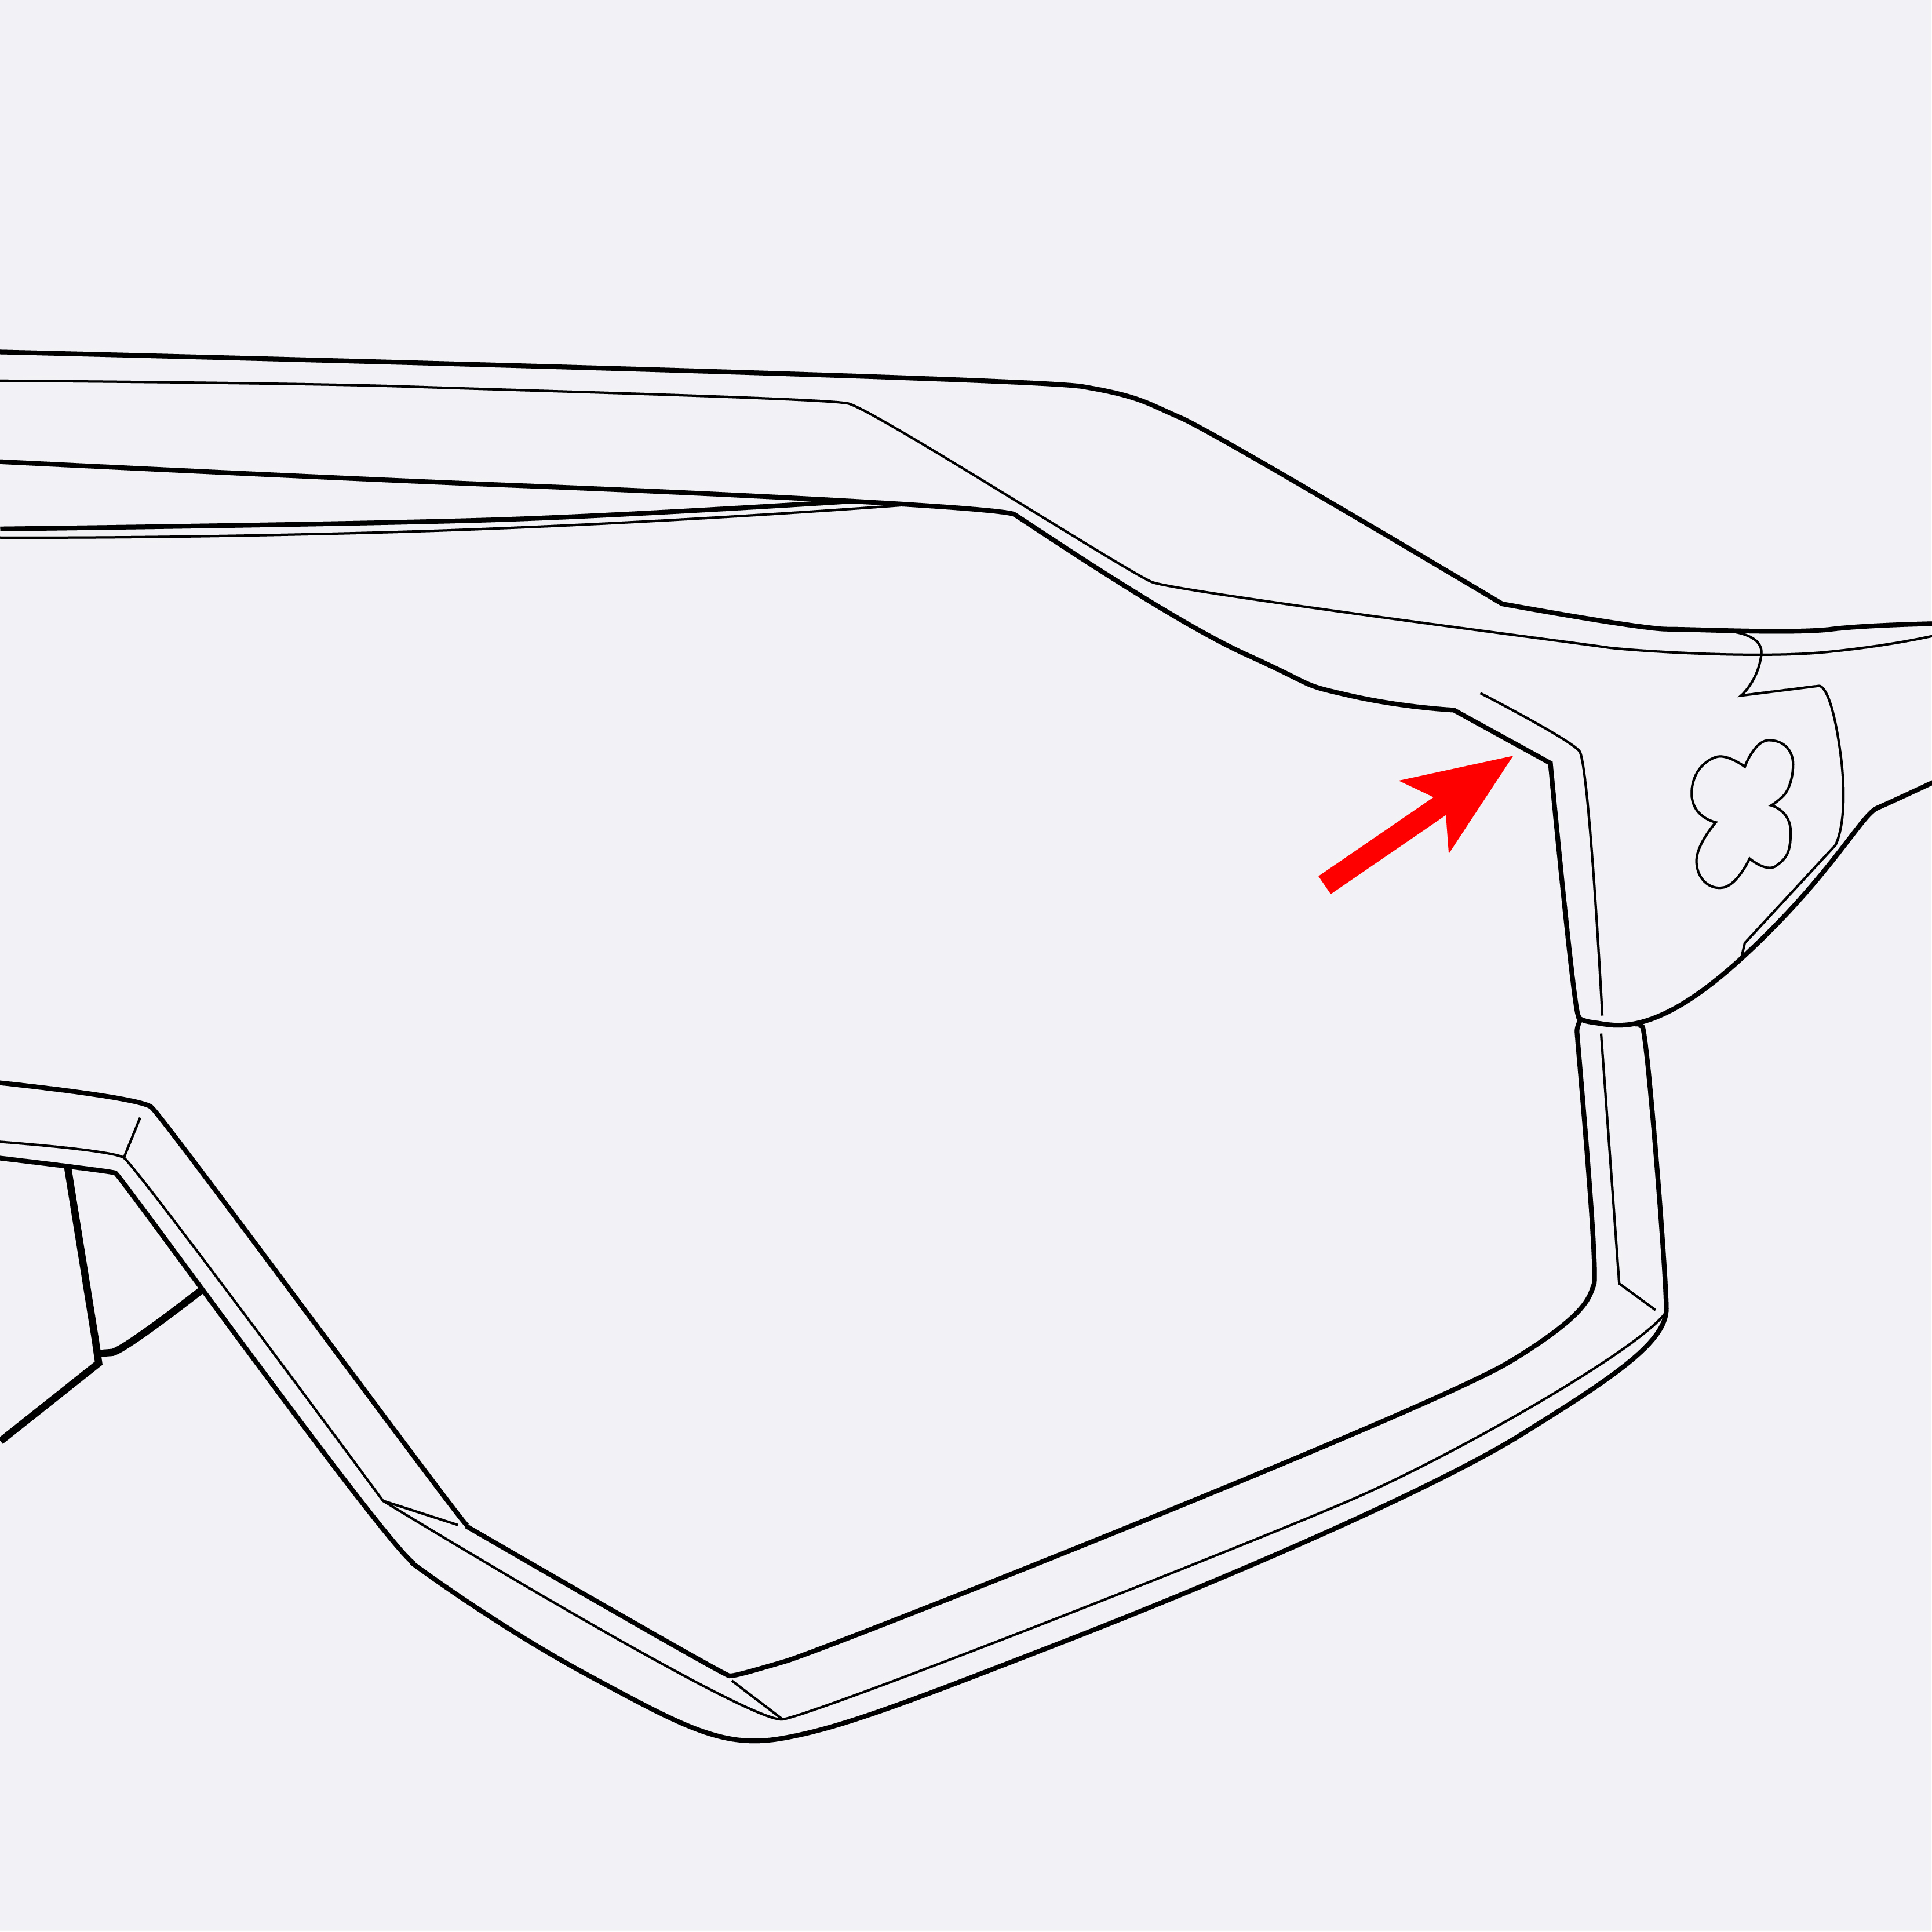
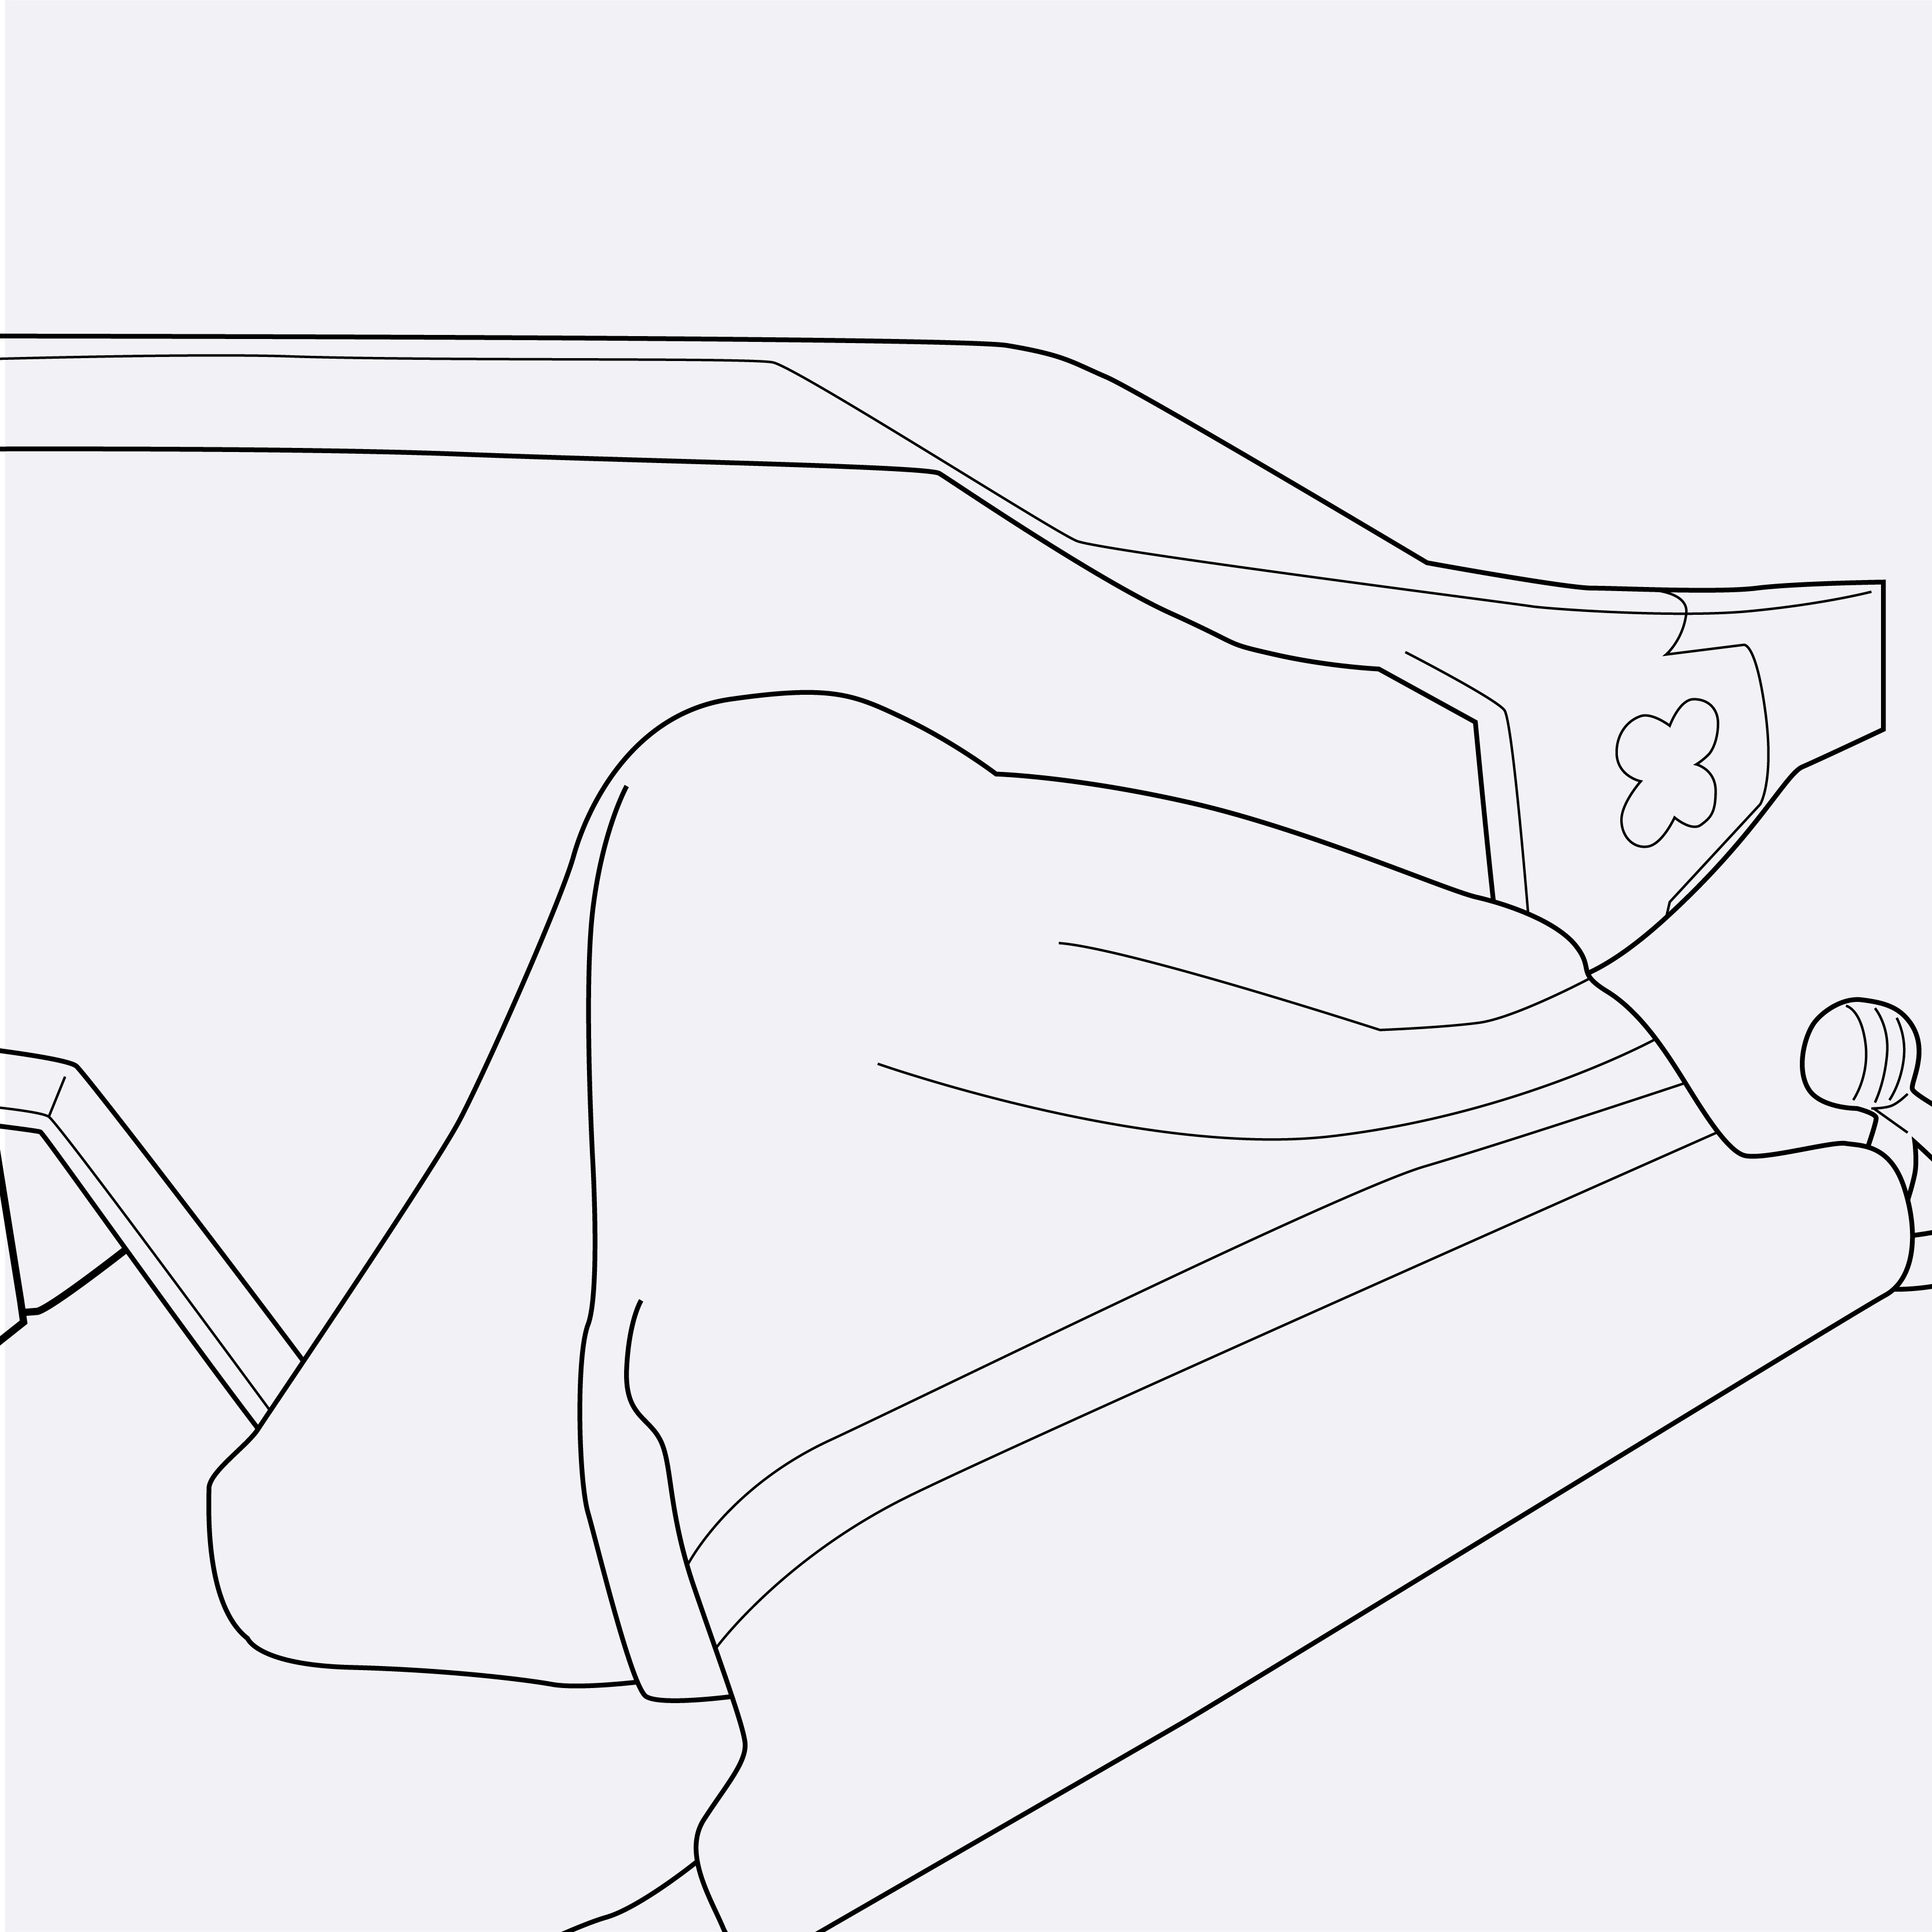
Removing the Nose Pad
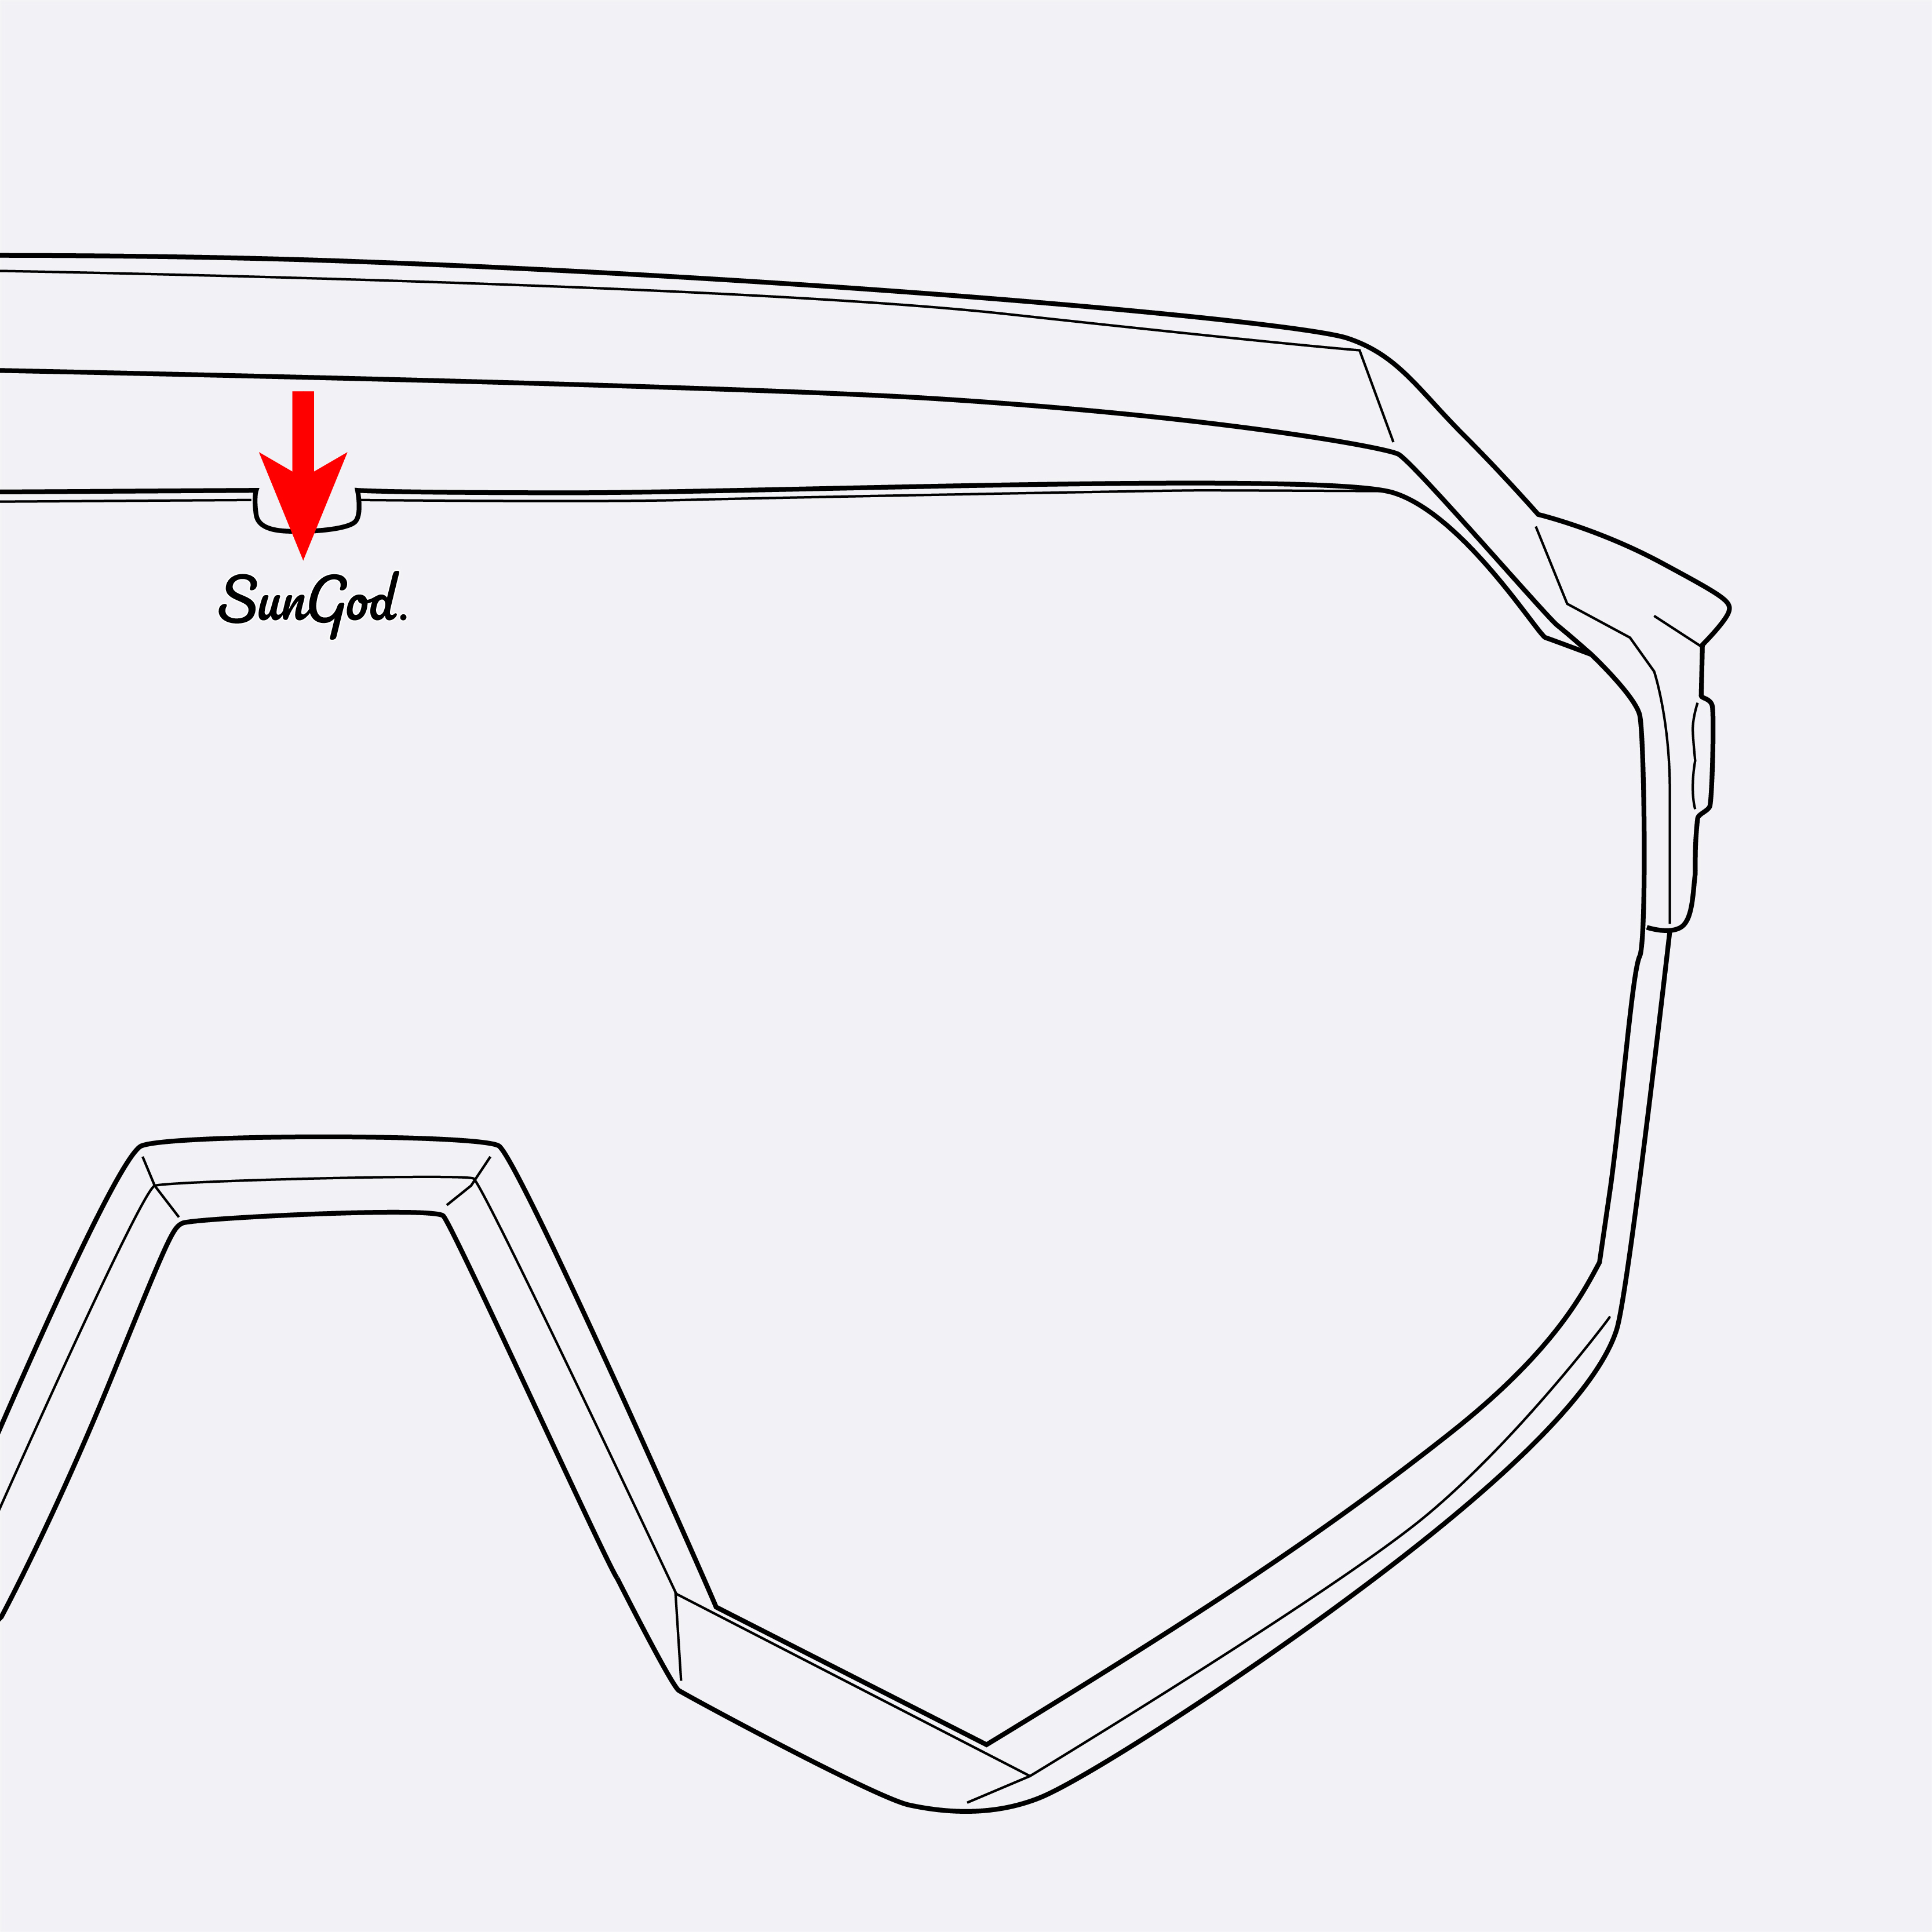
To remove the Nose Pad, pull down on each side. Replace with the new Nose Pad best suited to your face shape. When attaching the new Nose Pad ensure the "SunGod" and number are on the outside, and the grip texture sits against your nose.
- Changing your Vulcans TF Lens
- Changing your Vulcans FF Lens
- Vulcans Top Frame to Full Frame (TF to FF) conversion
- Vulcans Full Frame to Top Frame (FF to TF) conversion
- Troubleshooting
Helmet Compatibility
Vulcans have been designed to be compatible with all modern cycling helmet styles. Wear your Vulcans over your helmet strap.
If the ends of the arms are touching your helmet at the back, try moving up one Nose Pad size (#1 to #2, etc).
Wind Coverage
If you’re getting too much wind in your eyes, the frame is sitting too far from your face. Try moving down one Nose Pad size (#3 to #2, etc).
Lens Ventilation
If your lens is fogging whilst exercising, there's not enough ventilation getting to the back side of the lens. Try moving up one Nose Pad size (#1 to #2, etc).
Bouncing on Nose
If your Vulcans are bouncing on your nose, try moving up one Nose Pad size (#1 to #2, etc) and pressing on to your nose when you put them on. The hydrophilic properties of the Nose Pad will keep your Vulcans in place when you sweat and work hard.
Slipping down your Nose
The Nose Pads on your Vulcans are made from a hydrophilic material (attracts water). As you start to sweat your Vulcans will grip tighter to your nose. If they are slipping down your face whilst exercising, try pressing more firmly on to your nose. You can also try moving up one Nose Pad size (#1 to #2, etc).
If you've still got an unanswered question, please hit the button below, we'd be more than happy to help!
- How do I get replacement Ear Socks for my Pace Series Product?
Lost your Ears Socks or have they come loose? Not to worry, this is 100% covered by our Lifetime Guarantee.
Please complete the form found here to allow us to resolve the problem for you.
In the box asking you to describe the issue, please let us know which colour Ear Socks you'd like.
- Vulcans™ Lens Kits
You can find replacement Lens Kits for all SunGod products, including Vulcans™, here.


Didn't find an answer to your question?
Contact Us
